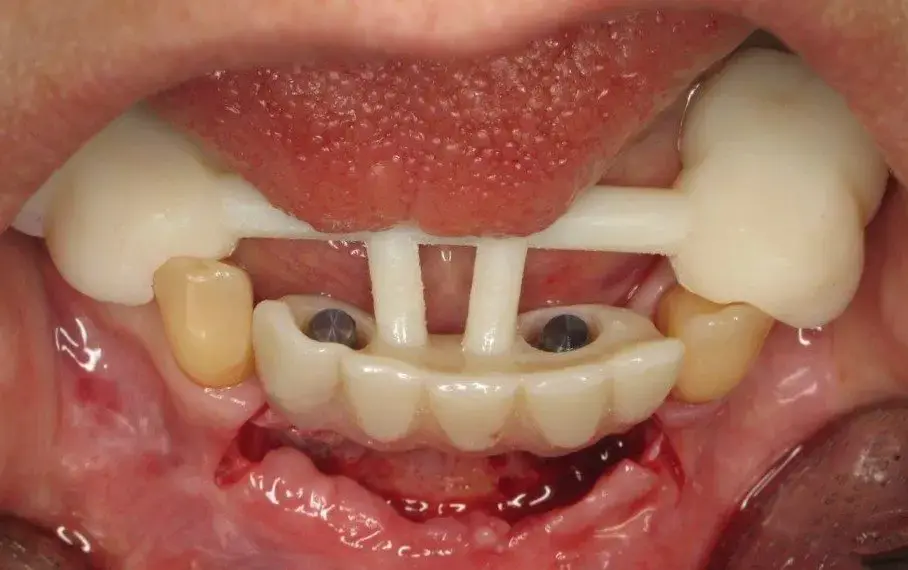
What is the GuidedTEMP system?
The GuidedTEMP system is a comprehensive solution for delivering immediate implant provisionals that follow the surgical guide placement.
The system uses the same digital file as the surgical guide, but instead of holding a sleeve, it holds temporary teeth, bridges, or multiple-unit restorations.
It provides a predictable and simple method for placing temporary restorations immediately following implant placement.
How does the GuidedTEMP ensure proper alignment?
The GuidedTEMP system ensures proper alignment through:
- Pre-planned trajectory: The hole in the temporary is pre-made according to the exact trajectory of the implant
- Abutment alignment: Positioned to match the trajectory of the temporary abutment
- Suspended positioning: Provisionals are suspended in the proper place for accurate pickup and luting
- Guided positioning: Uses the same digital file as the surgical guide for perfect alignment
What is the relationship between the surgical guide and the GuidedTEMP template?
The GuidedTEMP system uses the same digital file as the surgical guide. However, instead of holding a sleeve for implant guidance, the template holds the temporary tooth, teeth, or bridge restoration. This ensures perfect alignment and positioning based on the original surgical plan.
What are the main advantages of the GuidedTEMP system?
- Predictable results: Designed to work with guided implant placement
- Simple procedure: Straightforward backfilling technique
- Time efficient: Reduces surgical time and chairside adjustments
- Minimal contact adjustment: Less likely to require extensive modifications during surgery
- Immediate function: Provides immediate provisional restoration
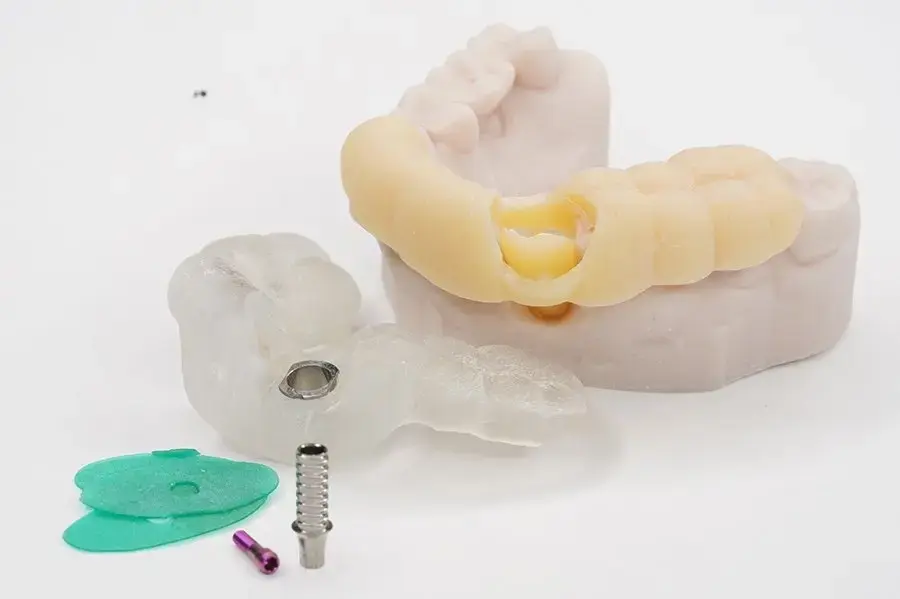
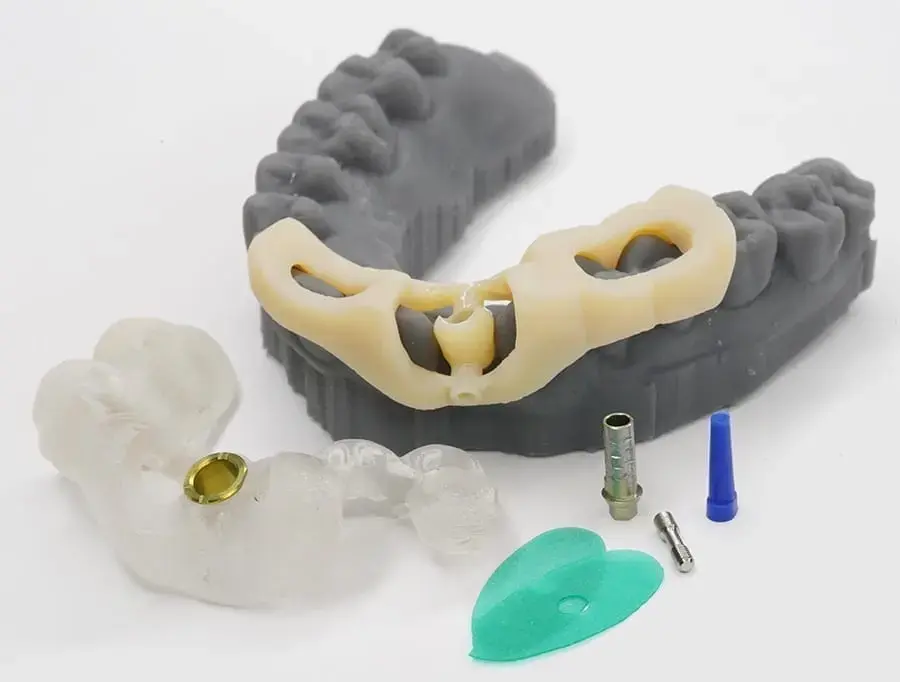
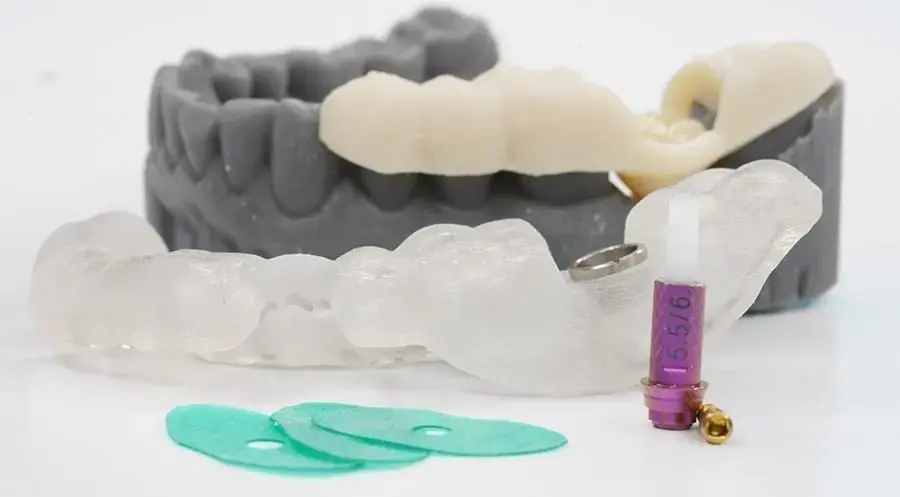
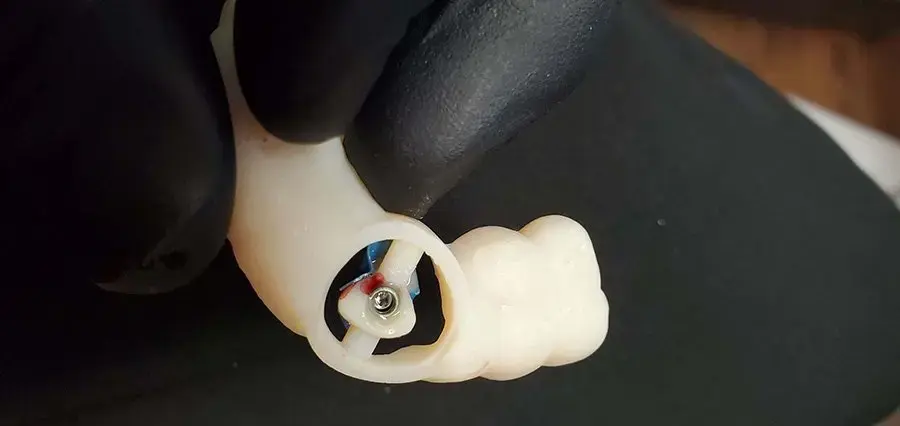
What components are included in the GuidedTEMP package?
The complete GuidedTEMP package includes:
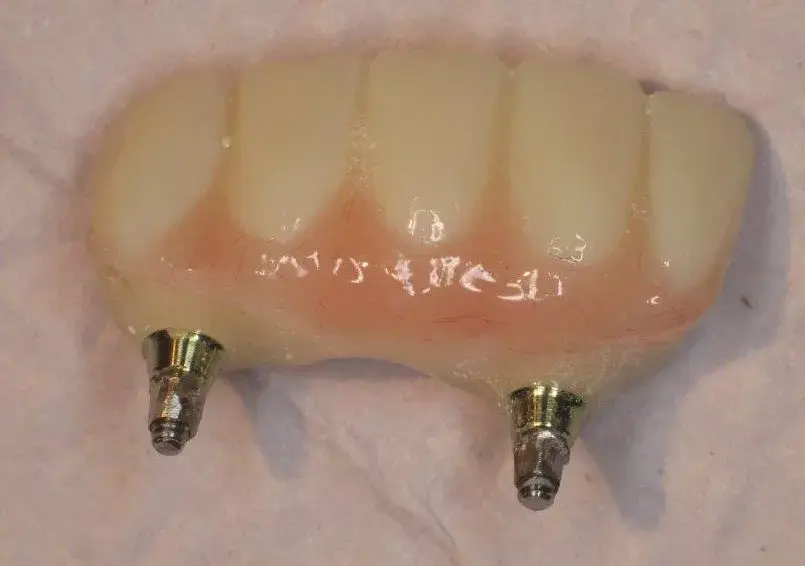
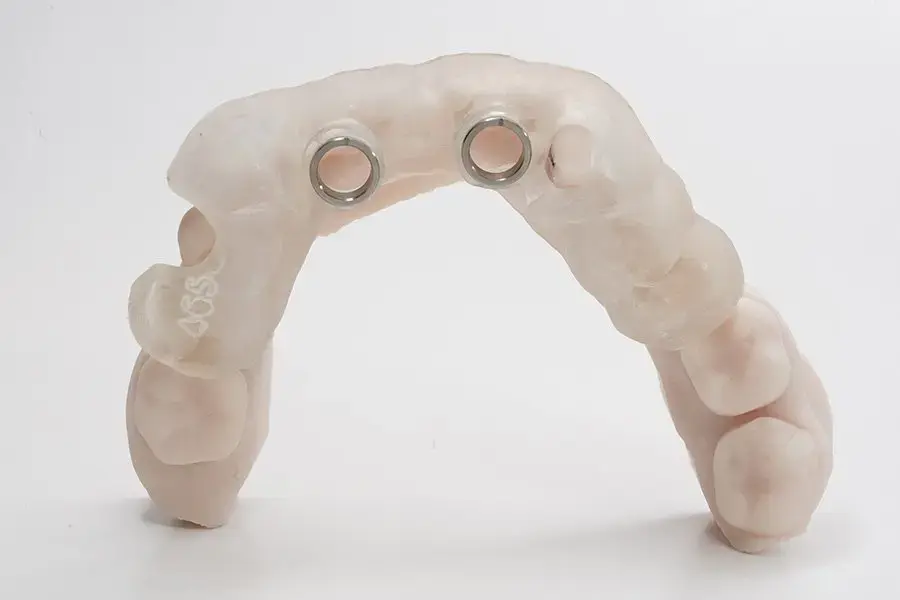
- Surgical guide (preferably fully guided, where the implant fits through the sleeve)
- Immediate provisional template with temporary restoration and access hole
- Temporary abutment (typically OEM part from implant manufacturer)
- Implant screw
- Plugs for cylinder blockout (typically blue, sometimes clear)
- Blockout gaskets that sleeve over temporary cylinders to prevent material locking
- For most cases, we include and send the recommended parts with the case package
What is the difference between fully guided and drill-only surgical guides?
Fully Guided Surgical Guide (Preferred):
- Allows the implant to fit through the sleeve and be guided during placement
- Provides superior accuracy for implant positioning
- Ensures temporary cylinders are in ideal planned positions
- Minimizes adjustments needed for GuidedTEMP
Drill-Only Surgical Guide:
- Only guides the drilling sequence, but not the actual implant placement
- Implants are placed freehand after drilling
- May result in less precise positioning
- Can require more adjustment of the GuidedTEMP due to implant position variations
- There are methods for using GuidedTEMP with this approach, but they are more technical and challenging
Can I complete the restoration chairside, or does it need to be sent to the lab?
You have two completion options:
Chairside Completion:
- Backfill directly in the mouth
- Perform immediate adjustments and equilibration
- Complete the case in a single appointment
- Suitable for simpler cases
Lab Completion:
- Remove the entire GuidedTEMP appliance after initial placement
- Unscrew all sites and take them to the lab
- Add material to fill any voids underneath
- Polish and adjust in a controlled environment
- Return for final placement and equilibration
- Preferred for complex multiple-unit cases or when extensive adjustments are needed
What materials are recommended for backfilling the temporary restoration?
Several options are available for backfilling:
- Flowable composite: Allows for precise shade matching
- Light-cured composite: Tooth-shaded materials for controlled curing
- Stellar DC acrylic: Available in tooth shades, though sometimes slightly brighter than natural teeth
- Other tooth-shaded materials: Various materials are available in multiple tooth shades
Note: Shade options have improved significantly over time, with many more shades now available compared to earlier cases.
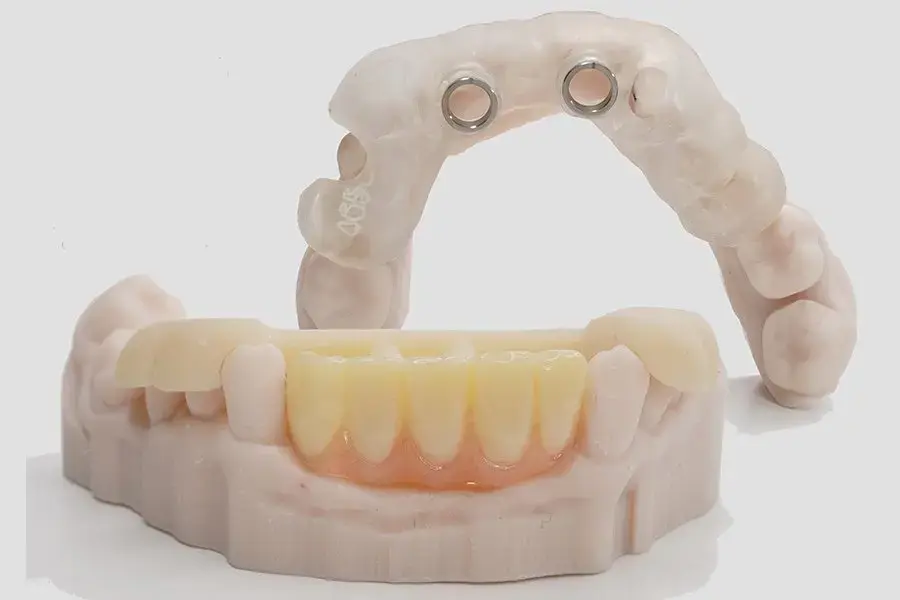
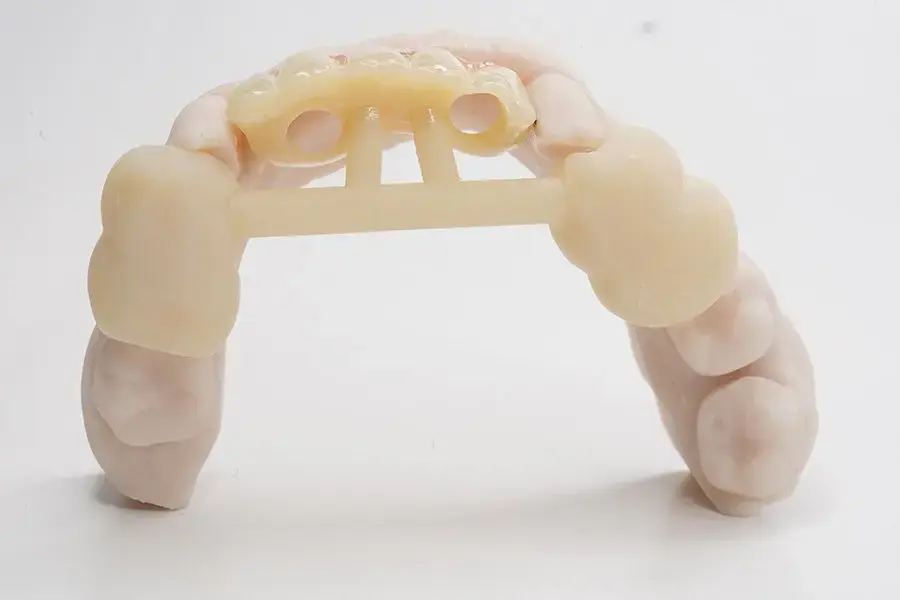
Can the GuidedTEMP system accommodate multiple implants or bridge work?
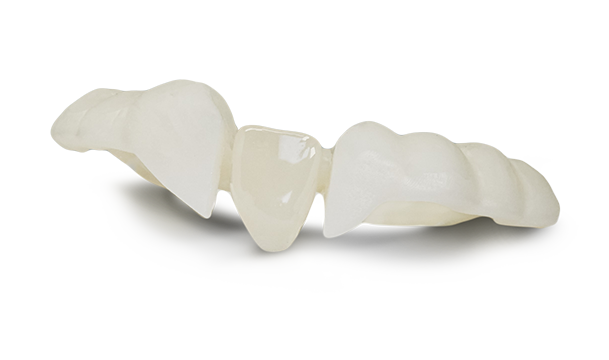
Yes, the GuidedTEMP system can accommodate various restoration types, including:
- Single tooth restorations
- Multiple individual teeth
- Bridge restorations
- Multiple-unit bridges with many sites
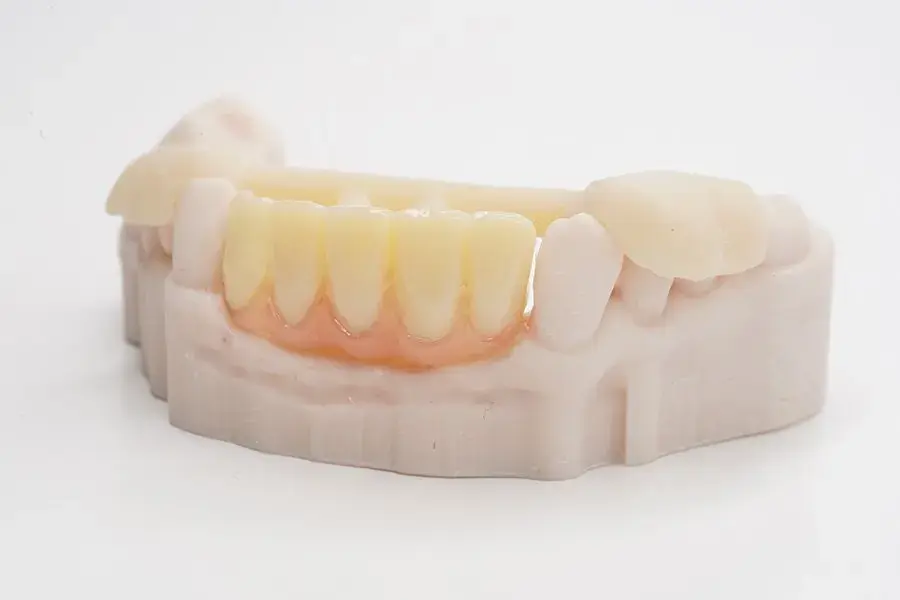
- Multiple implant cases (e.g., bicuspid and molar extractions with three implants). The template rests on adjacent teeth and slides over the temp cylinders for multiple-unit cases. The provisionals are suspended over the implant sites using tooth-supported guides.
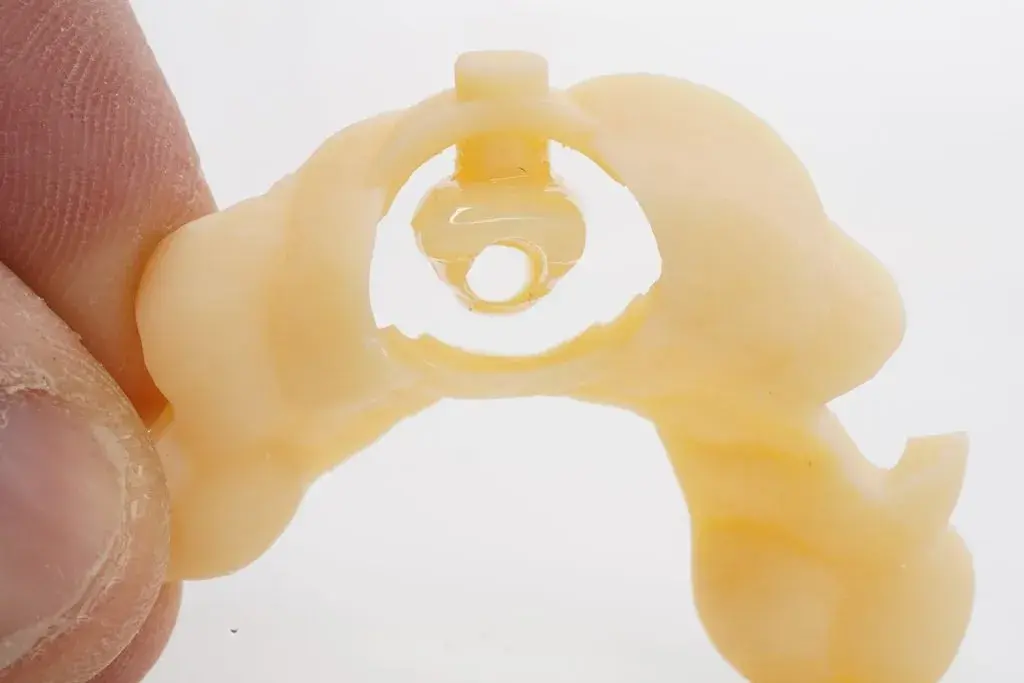
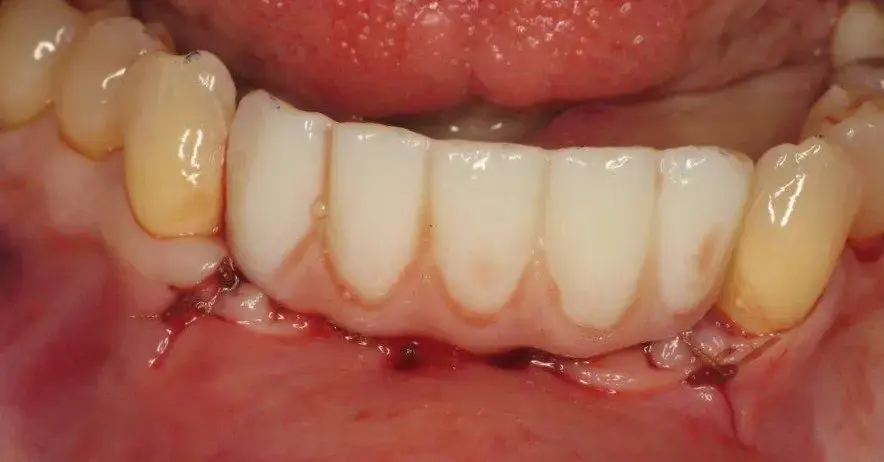
What is the emergence profile design of GuidedTEMP restorations?
The emergence profile of GuidedTEMP restorations is designed to be narrow, emerging directly from the temporary abutment.
This design:
- Minimizes pressure on tissue in flapless procedures
- Reduces the need for subgingival adjustments
- Provides optimal tissue management during healing
What is the step-by-step basic procedure for using GuidedTEMP?
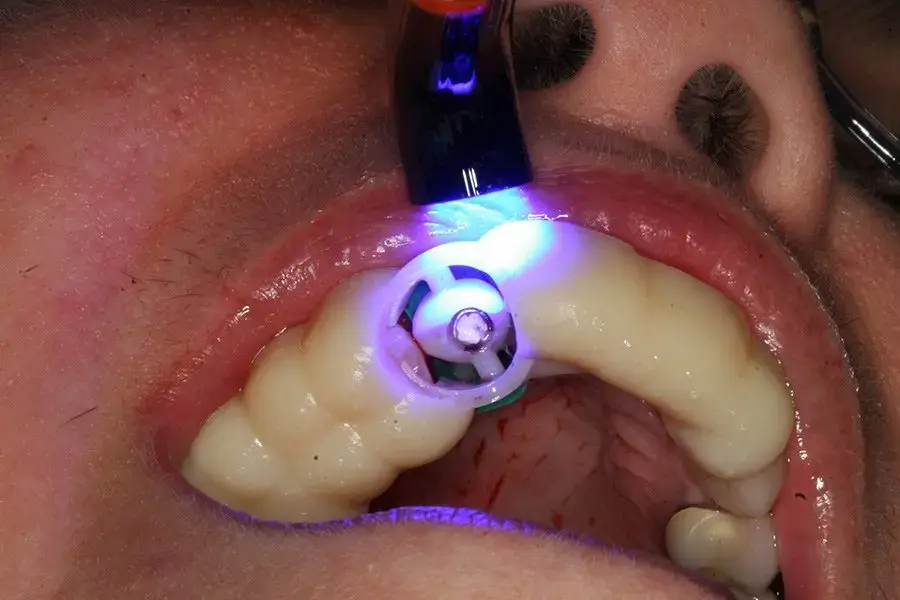
- Guide verification: Seat the surgical guide and ensure proper fit without rocking; adjust if necessary
- Site preparation: Complete extraction if needed and seat the guide
- Osteotomy creation: Follow the guided kit sequence for site preparation
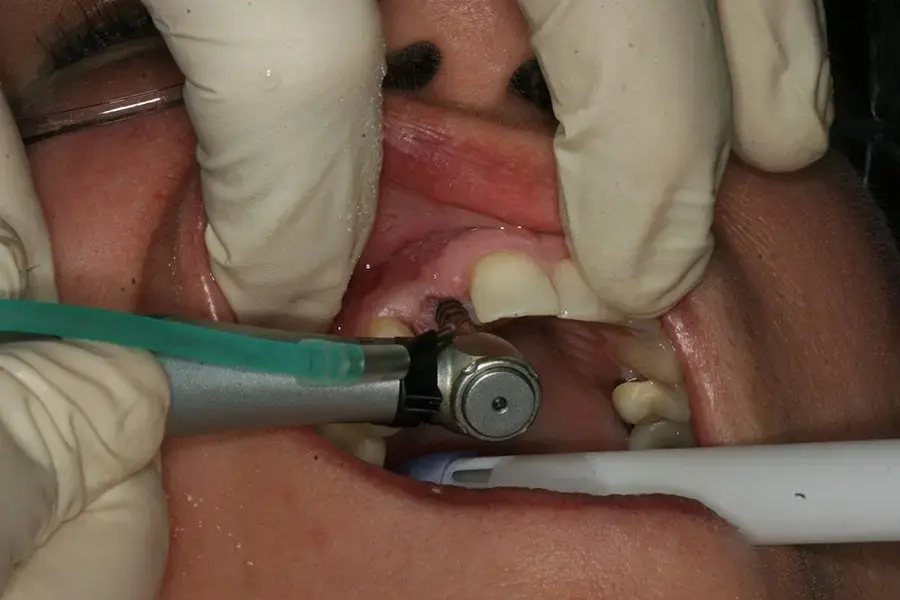
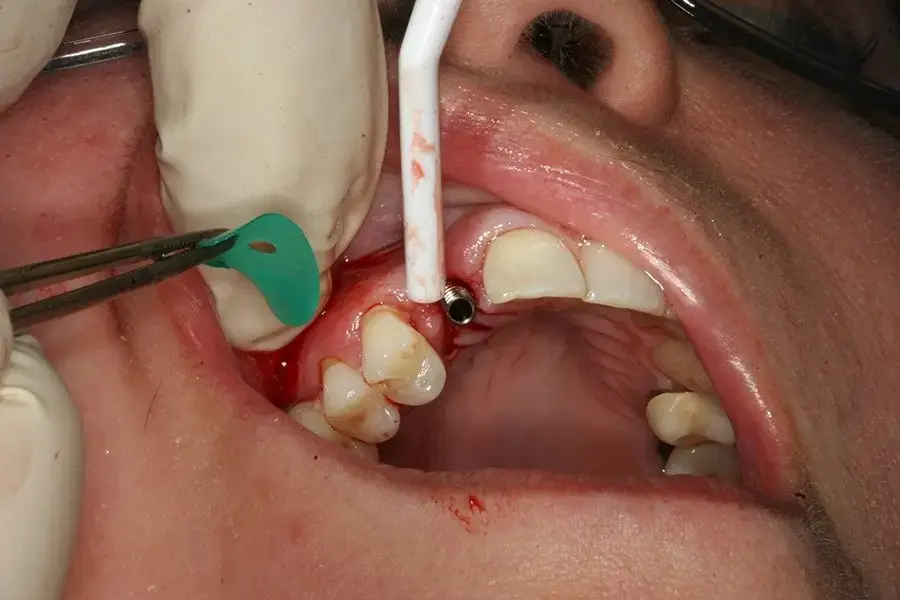
- Implant placement: Place the implant through the guide using the master tube for proper indexing, rotation, and depth
- Torque verification: Ensure the implant is properly torqued and secure
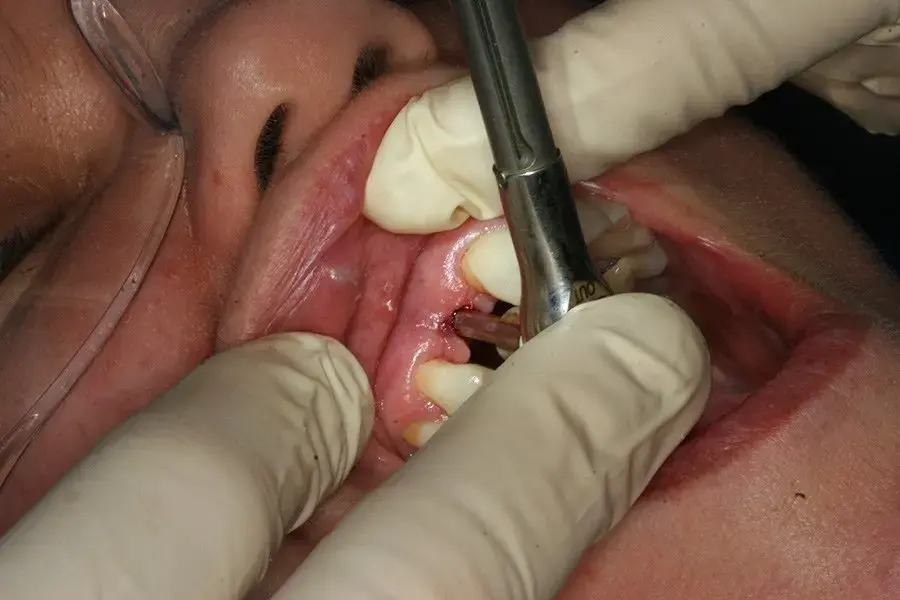
- Abutment placement: Seat the provided temporary abutment
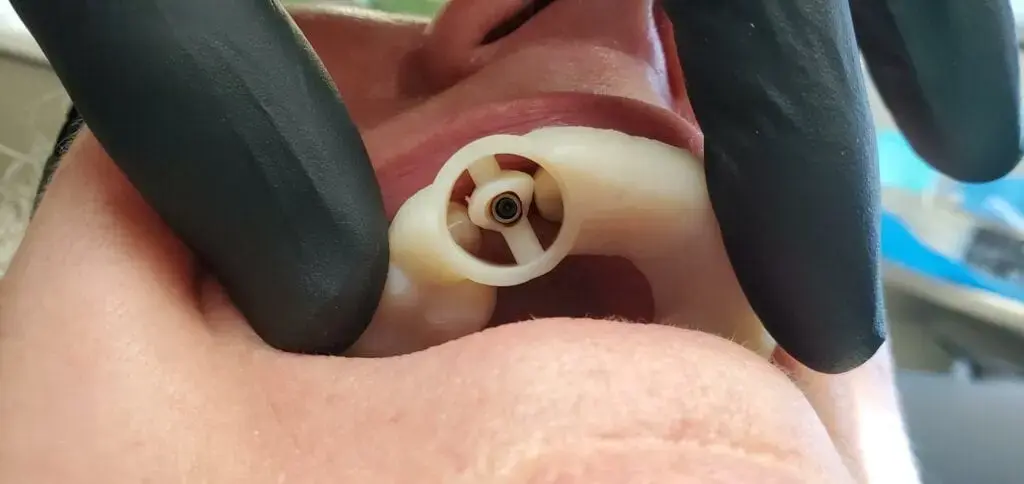
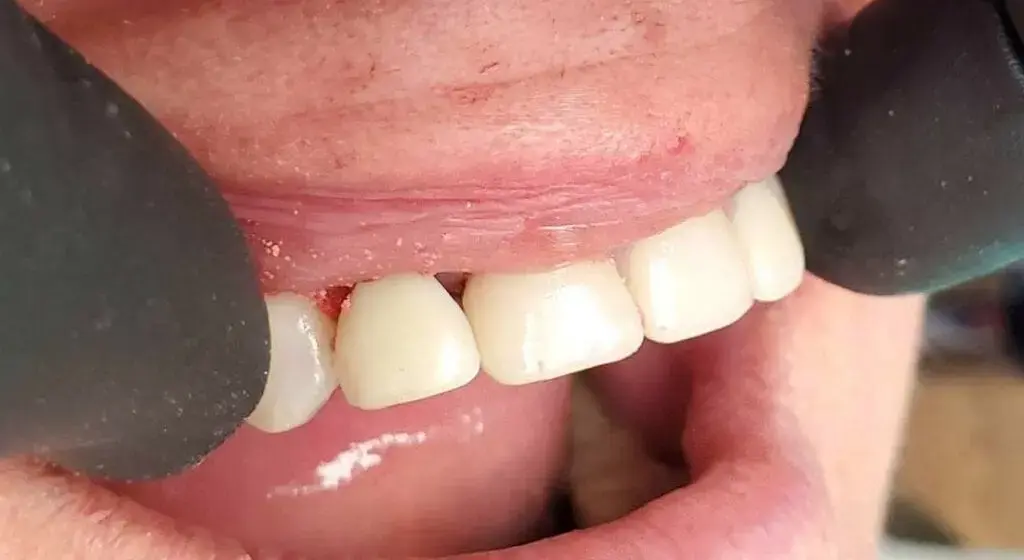
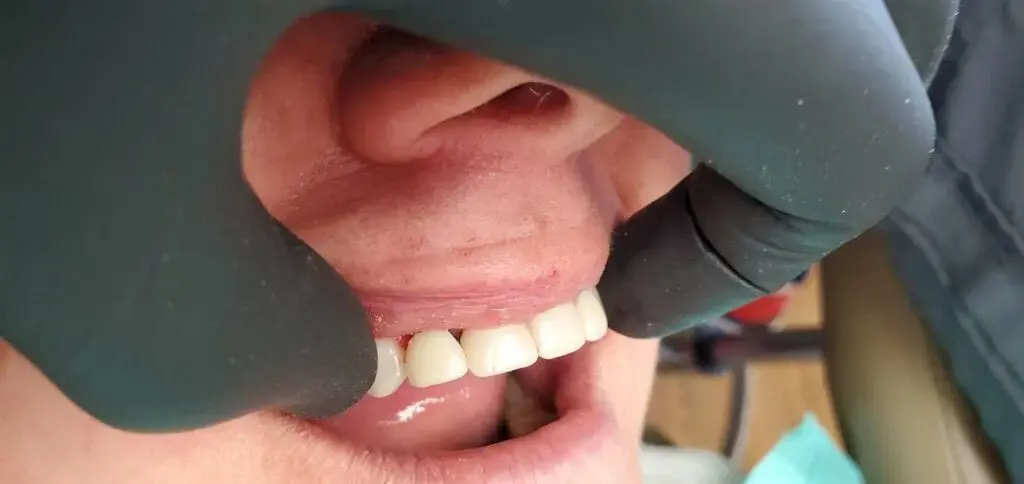
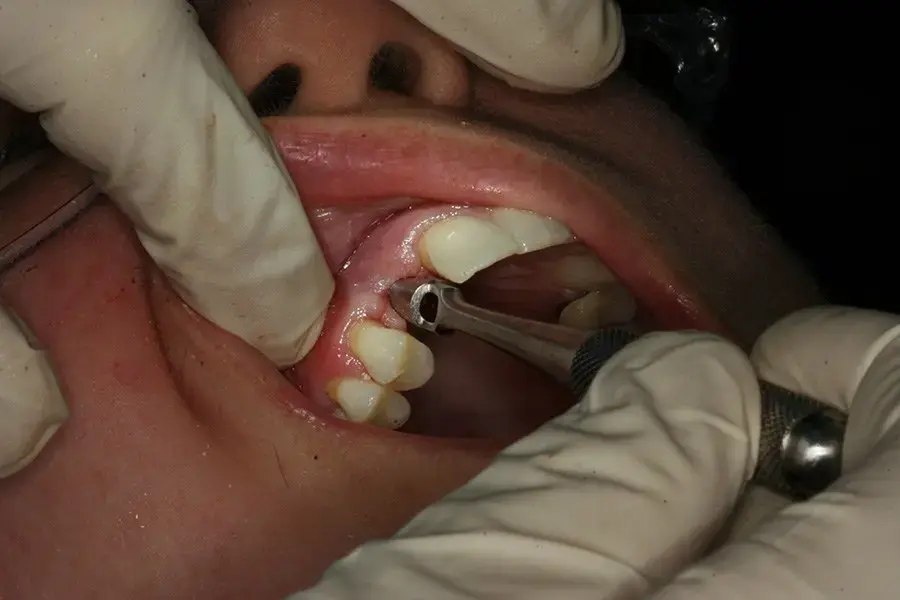
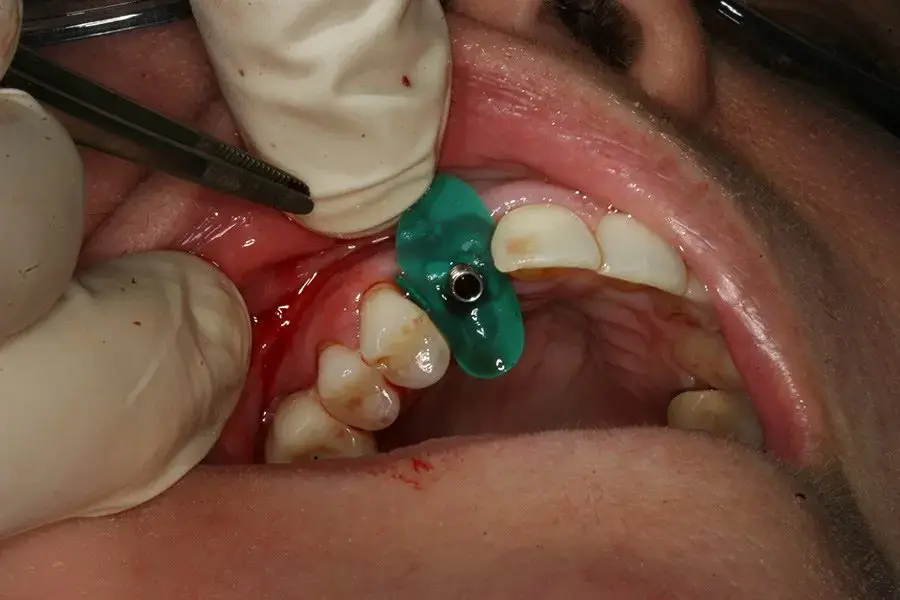
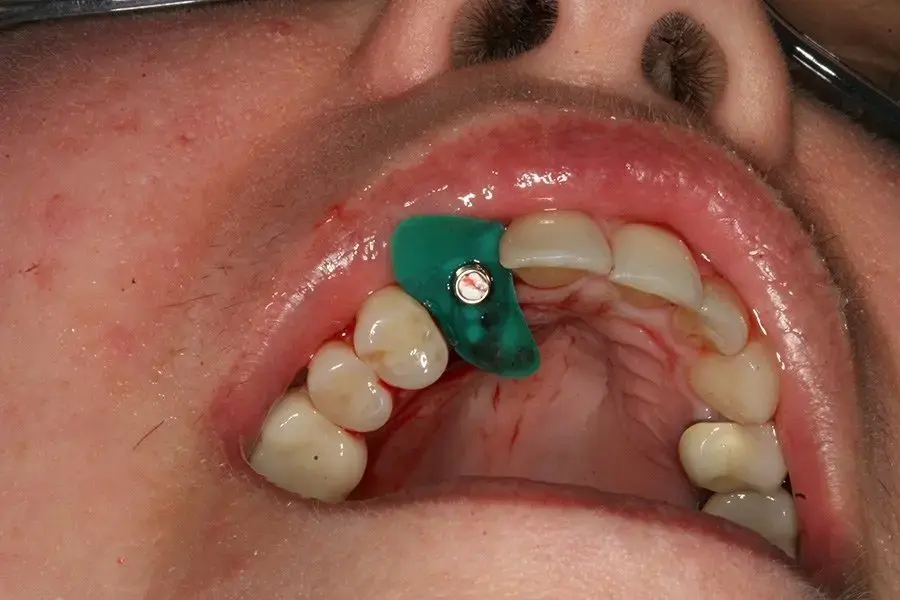
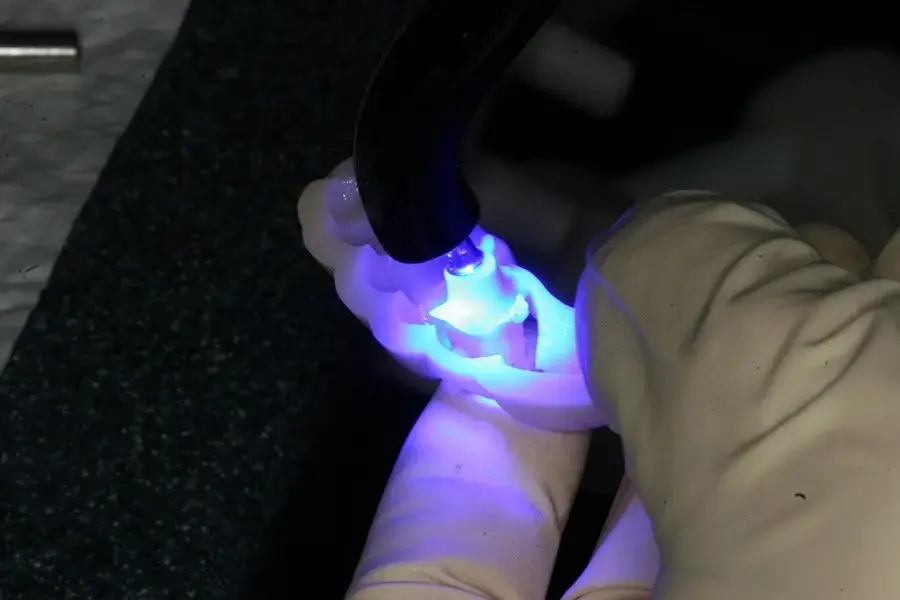
- Template positioning: Place GuidedTEMP (using the same file as the surgical guide but holding the tooth/teeth instead of the sleeve)
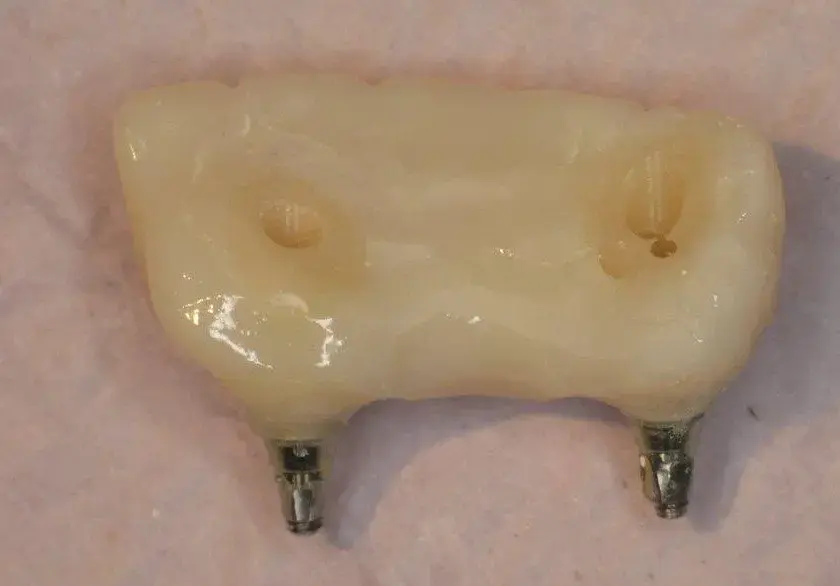
- Restoration delivery: The template rests on teeth and slides over the temp cylinders
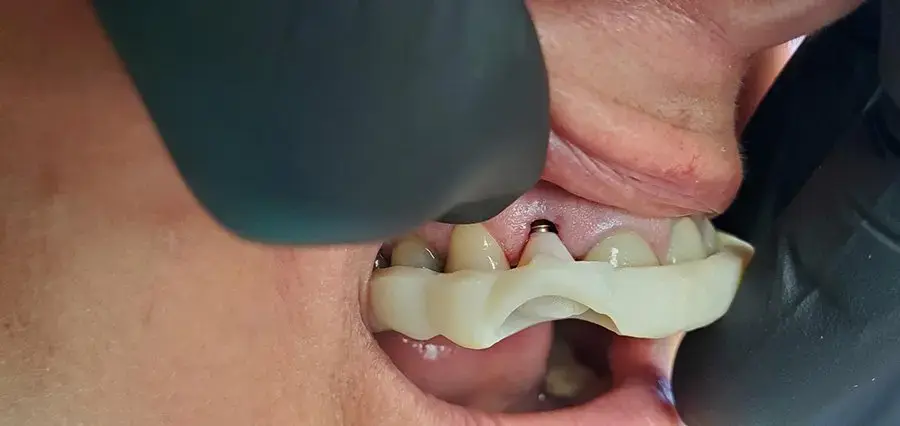
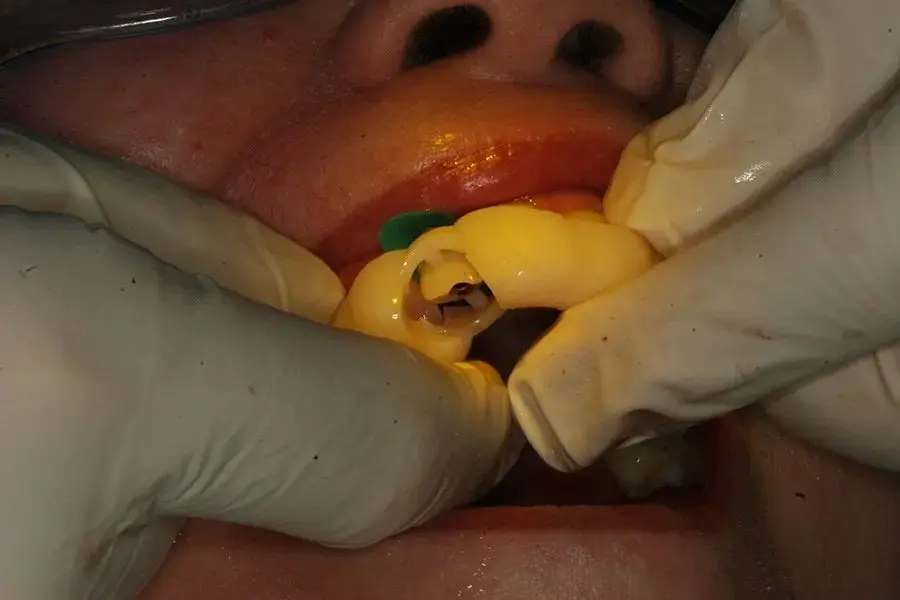
What is the step-by-step procedure for single units using GuidedTEMP?
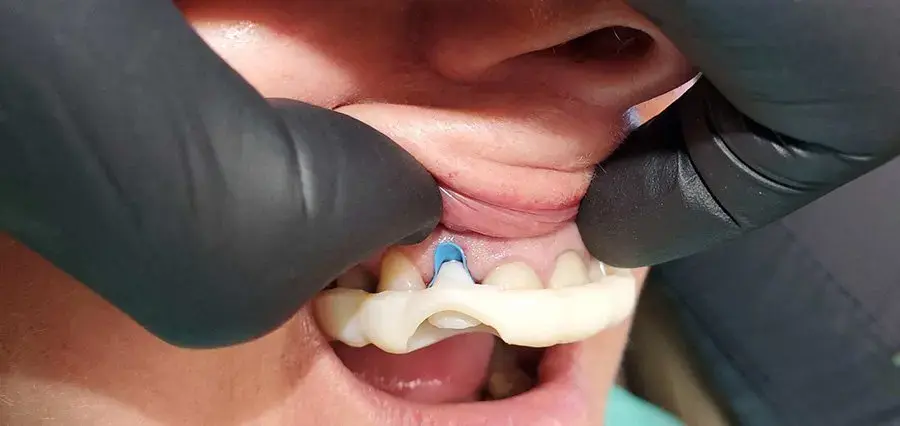
- Place template passively without abutment contact
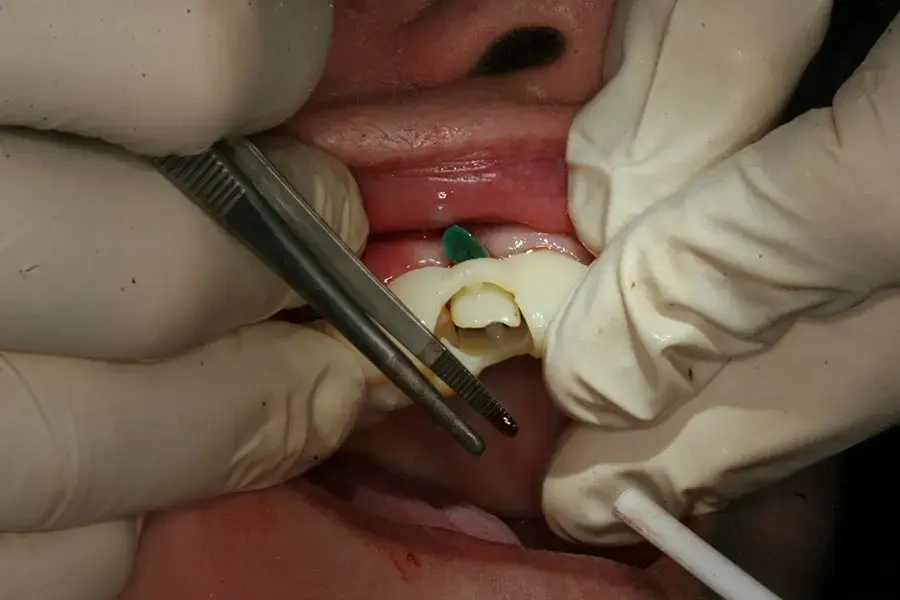
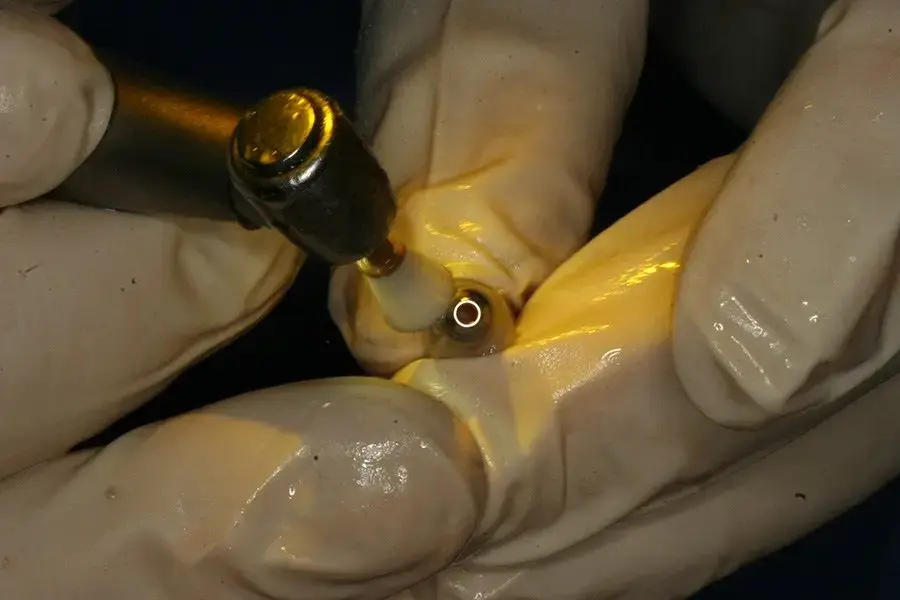
- Backfill the void around the temp cylinder with the chosen material
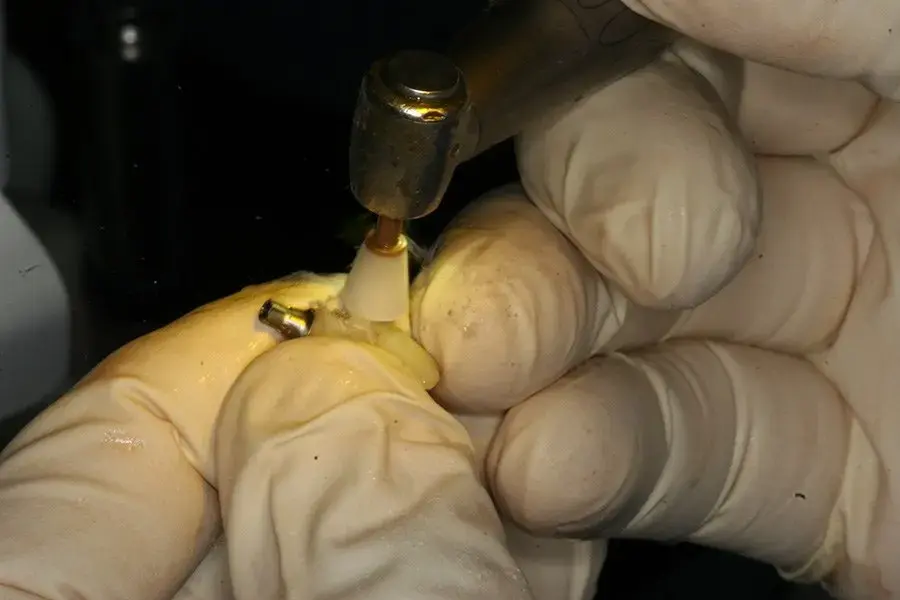
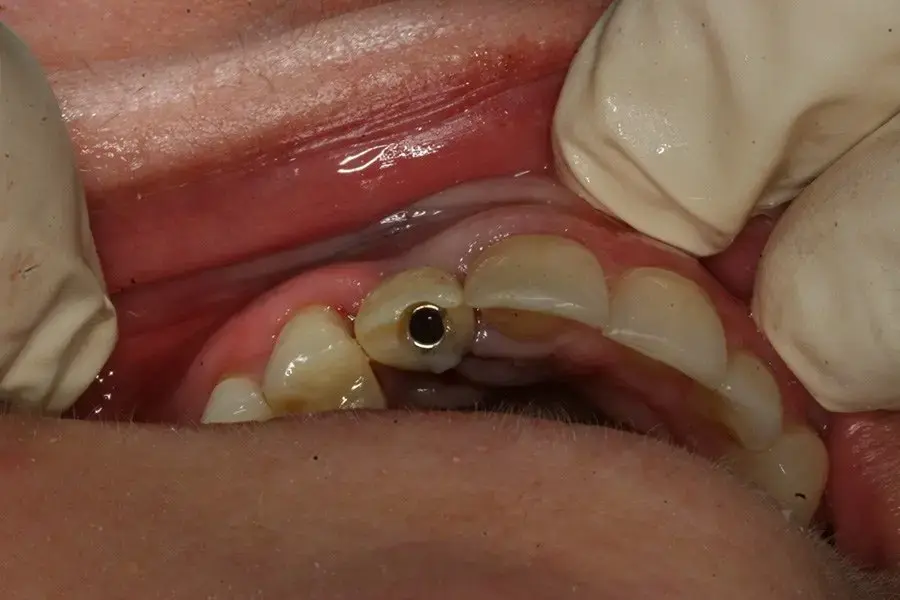
- Trim, contour, polish, and seat the final restoration
What is the step-by-step procedure for multiple units/bridges using GuidedTEMP?
- Position template over temp cylinders, ensuring supports are fully seated on adjacent teeth
- Check that occlusion is correct
- Verify the template is passive with no metal touching cylinder walls
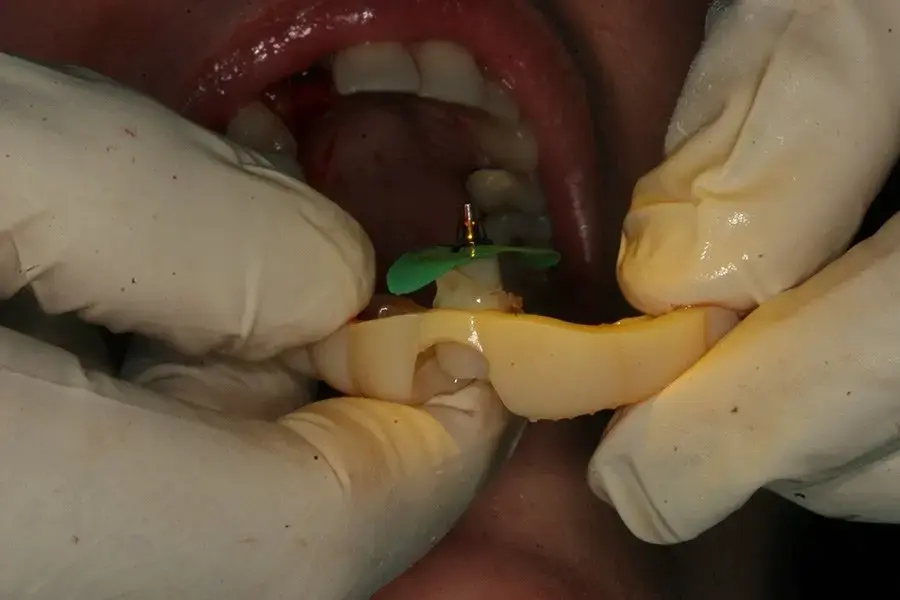
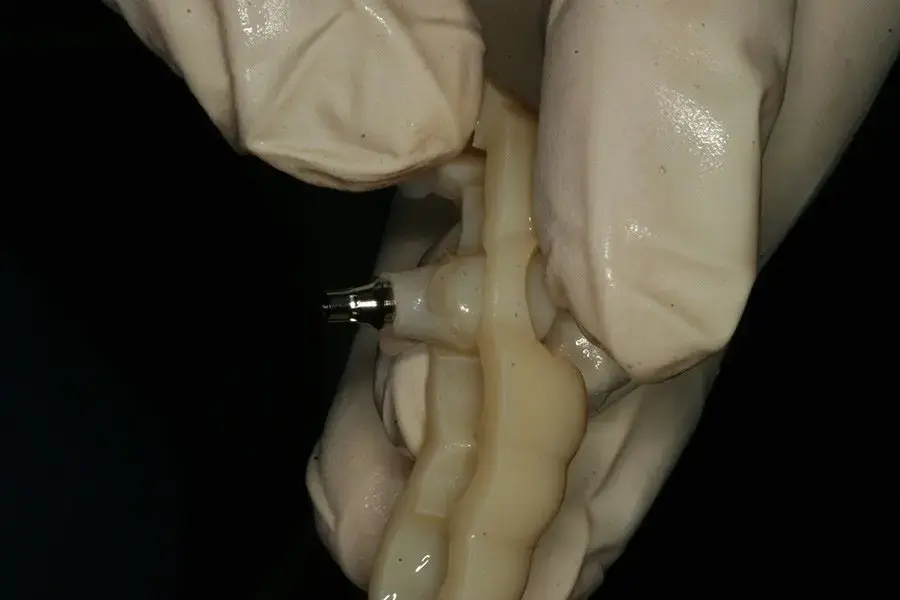
- Remove the template and block out cylinders using the provided plugs and gaskets
- Place blockout plugs in temporary cylinders
- Backfill with composite or light-cured material
- Either complete chairside adjustments or remove the entire appliance for lab completion
- For lab completion: unscrew all sites, take to the lab, add material to fill voids, polish, adjust, and return
- Perform equilibration until properly adjusted
How do I ensure proper implant positioning with the master tube?
The master tube accommodates both the implant driver and abutment, allowing you to seat the implant with correct indexing, rotation, and depth according to the treatment plan. This ensures the planned position matches the delivered result.
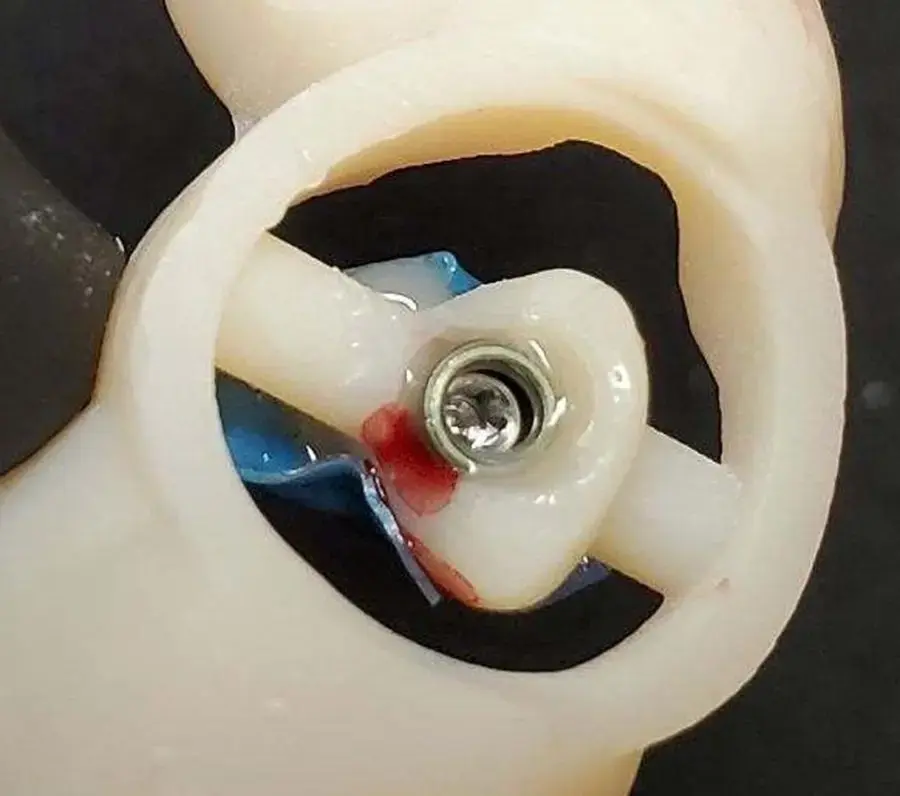
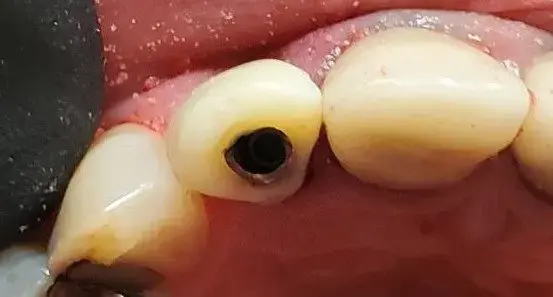
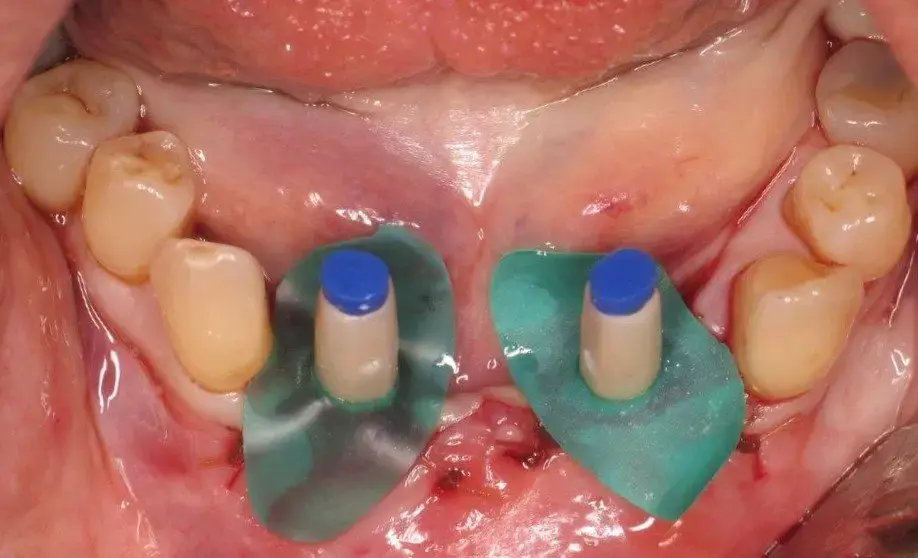
What is the blocking out procedure and why is it necessary?
The blocking out procedure prevents flowable material from getting underneath and locking components in place:
- Install gaskets: Sleeve blockout gaskets over temporary cylinders
- Insert plugs: Place blockout plugs inside the holes of temporary cylinders
- Verify seal: Ensure complete blockout before backfilling
- Backfill safely: Apply flowable material without risk of locking mechanisms
This procedure is essential for allowing proper removal and adjustment of the restoration.
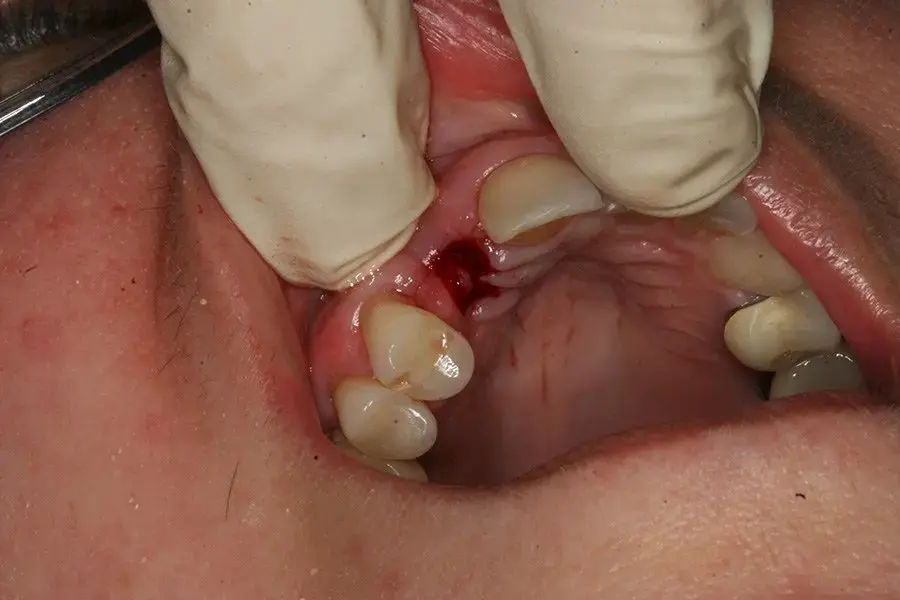
What should I check before placing the GuidedTEMP template?
- Ensure no tissue covers the implant interface
- Verify the template seats passively without contact on abutments
- Confirm there is no pressure on the implant in any direction
- Address any tissue interference that may need management
Can the procedure be performed with or without flap elevation?
Yes, the procedure can be performed both ways. If flap elevation is desired, inform the lab during the online consultation meeting so a window can be placed in the guide to accommodate labial or lingual tissue flapping.
What information do I need to provide during the planning phase?
During the online consultation meeting, specify:
- Whether flap elevation will be performed (for guide window placement)
- The implant system being used
- Any specific clinical considerations or preferences
- Desired temporary abutment specifications
How do I ensure the surgical guide fits properly?
Always verify guide fit before beginning the procedure:
- Seat the guide completely
- Check for any rocking or instability
- Make necessary adjustments before proceeding
- Ensure the guide remains stable throughout the procedure
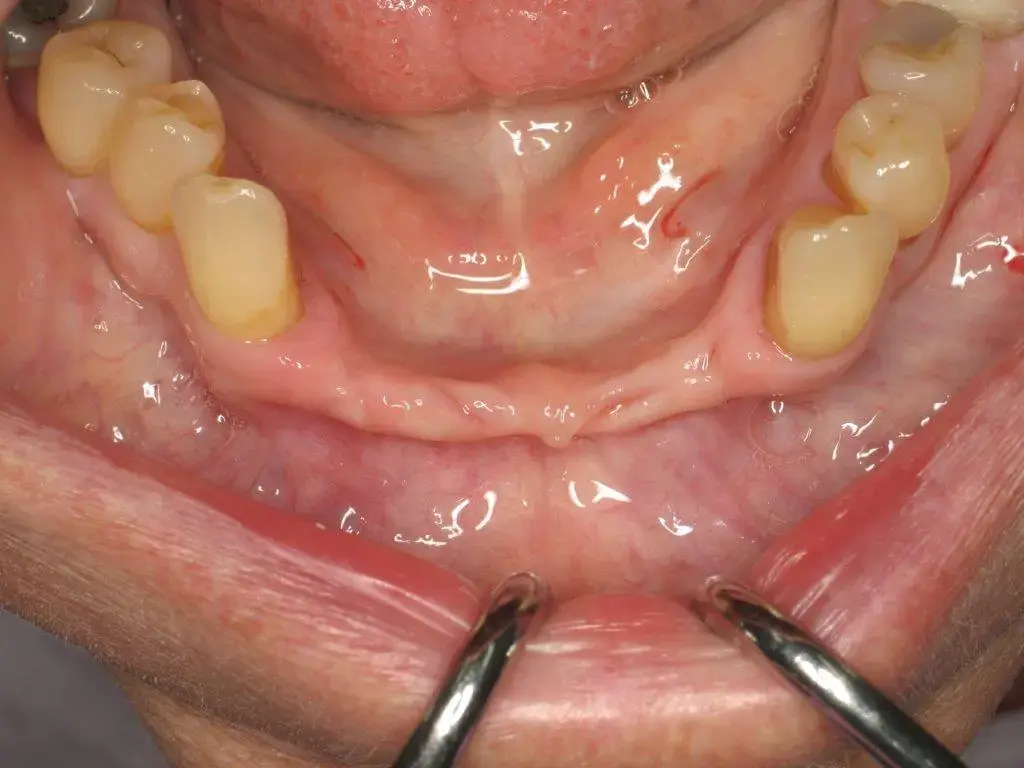
What should I consider for immediate extraction cases?
For immediate extraction procedures:
- Complete extraction fully before guide placement
- Ensure adequate site healing if applicable
- Verify guide seating after extraction
- Follow standard guided surgery protocols for site preparation
What if adjustments are needed for multiple implant cases?
For multiple implant cases, several adjustment options are available:
- Minor adjustments: Can be made chairside during initial placement
- Internal adjustments: May be needed to ensure passive fit with no metal touching cylinder walls
- Lab refinement: Remove the entire appliance, complete the lab work, and return for final placement
- Equilibration: Perform occlusal adjustments until proper contact is achieved
- Void filling: The Lab can add material to fill any voids underneath for optimal fit
What if the contacts are not ideal after placement?
Even with guided placement, minor contact adjustments may be necessary. The GuidedTEMP system minimizes but does not eliminate the need for chairside modifications. Adjustments should be conservative to maintain restoration integrity.
How much material is typically needed for backfilling?
Backfilling requires minimal material as shown in clinical examples. The void around the temp cylinder is relatively small, requiring only enough material to fill the space both lingually and occlusally.
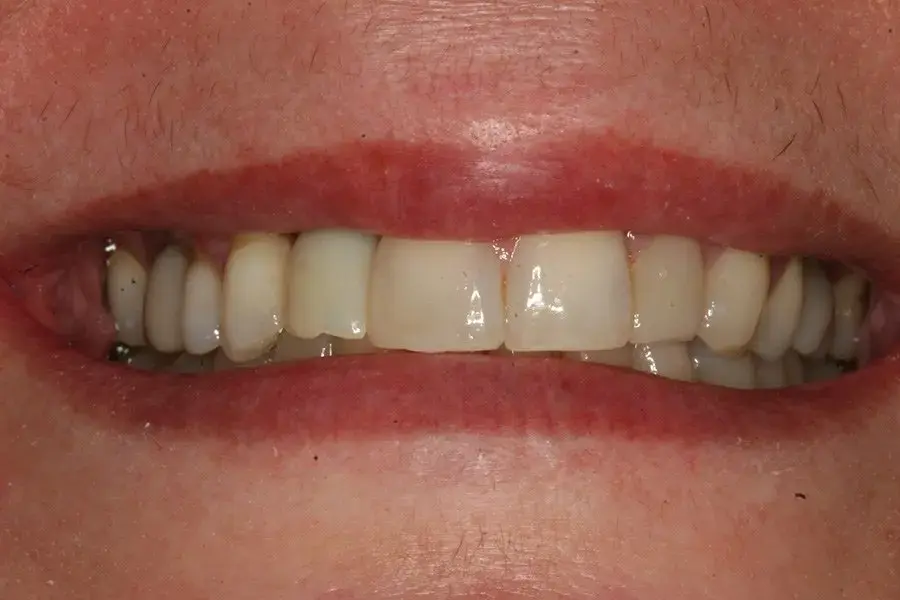
What if the restoration appears too bright after placement?
If using Stellar DC acrylic, it appears too bright:
- Consider a flowable composite for better shade matching
- Remember, this is a temporary restoration
- Evaluate the patient's existing dentition for shade compatibility
- Plan for final restoration, shade correction if needed
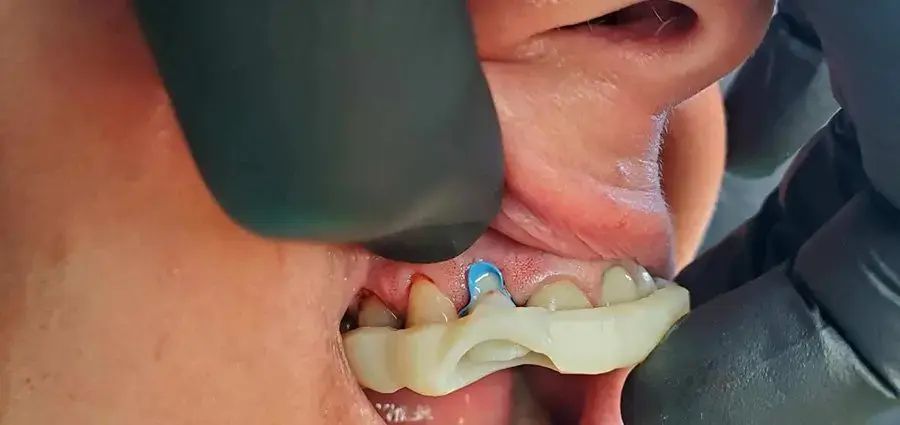
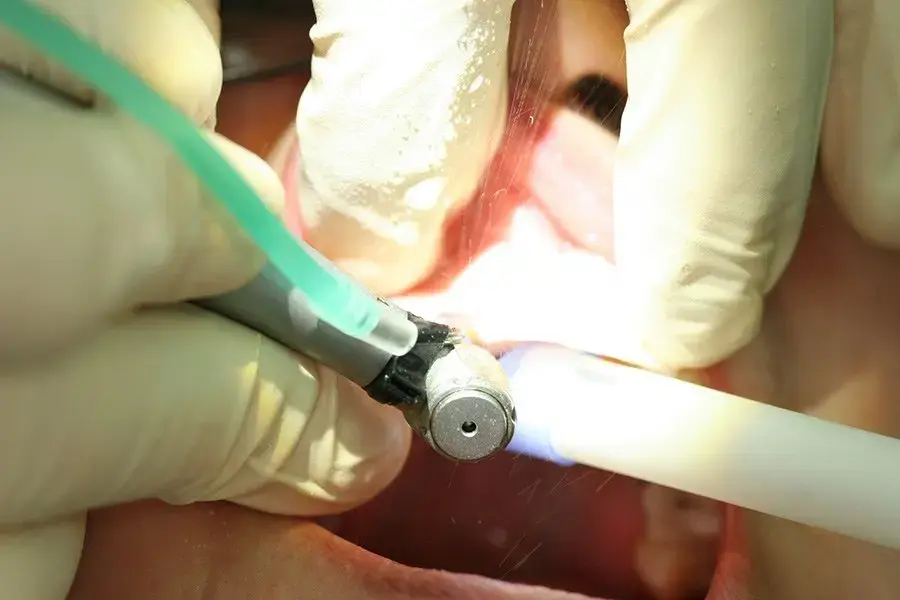
How do I finish and polish the restoration?
After backfilling:
- Trim excess material carefully
- Contour to the proper anatomical form
- Polish to a smooth finish
- Check occlusion and adjust as needed
- Verify patient comfort before dismissal