5. Restorative Phase

iJIG™

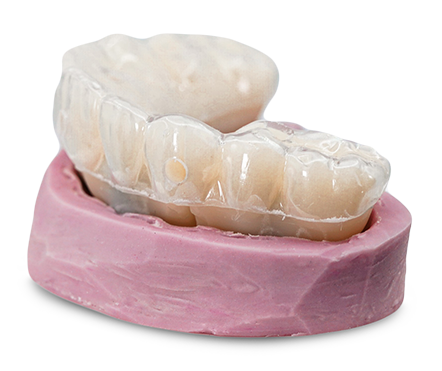
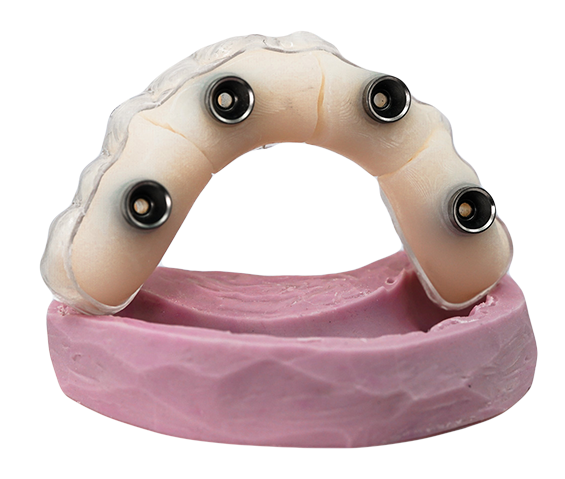
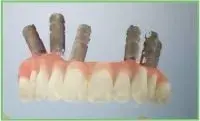
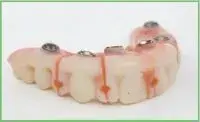
The iJIG is a patented (Patent no. 11589963) device used to easily, and digitally, transfer full arch records to ROE. If you have a digital impression scanner, iJIG makes record collection simple.

What is the iJIG?

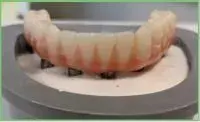
  • iJIG is a fit verification jig and final prosthetic proposal all-in-one.  It allows the doctor to lute passive sections together in the mouth, equilibrate the occlusion, capture the bite, pick-up the tissue, and basically capture and send all the records needed to create a final or prototype restoration. It is an amazing device.
  • To create an iJIG, simply order our iJIG Scan Analogs and capture a digital impression and upload – watch the video below for the technique. Read below about iJIG Scan Analog compatibility.
  • The steps are simple (see the necessary records needed for the iJIG  below). Ensure that you ordered and received iJIG Scan Analogs from ROE – must inform ROE of the implant system. They are specific to this technique and can not be substituted.
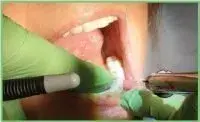
  • Watch the second video below for how to manage the iJIG seating appointment with the patient.

Compatible Implants:

  • iJIG works with almost every popular implant system: Nobel, BioHorizon, NeoDent, Biomet 3i, Straumann, Hiossen, Thommen, Keystone, others
  • However, if you are restoring Zimmer, Implant Direct, Camlog, Astra, MIS, Straumann, Paltop, you must order OEM (original equipment manufacture – the implant company) MUA replicas to scan the prosthetic. Simply screw them into the prosthetic and scan according to our protocols.
  • Also, this second list of implant companies requires OEM parts to fabricated the iJIG and will increase the cost over 3rd party parts that are used on Nobel-compatible MUA’s. Call us to answer any questions on this.
CHROME GuidedSMILE iJIG

iJIG Instructions

Download the iJIG complete instructions.

iJig Scan Bodies/Analogs

Purchase our iJIG Scan Bodies/Analogs to get started.

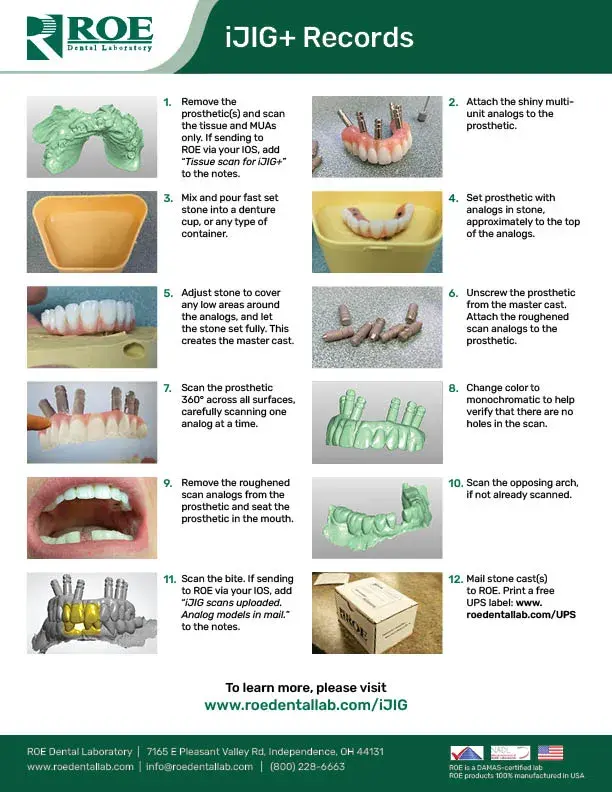
iJig+ Step-by-Step Records

iJIG+ Step-by-Step Records

7 Days

Lab Working Time

Free-Ebook-Download-Fundamentals
Free-Ebook-Download-Surgical

Videos

iJIG Patient Records

iJIG 6.0 with Tissue/MUA Scan
Subscribe to our YouTube Channel

How to scan for an iJIG

How to scan for an iJIG (single arch)
Subscribe to our YouTube Channel

iJIG Seating Appointment

iJIG Seating Appointment - ROE's fit verification jig with teeth
Subscribe to our YouTube Channel

iJIG + Records for Fabrication

iJIG Plus Records for Fabrication
Subscribe to our YouTube Channel

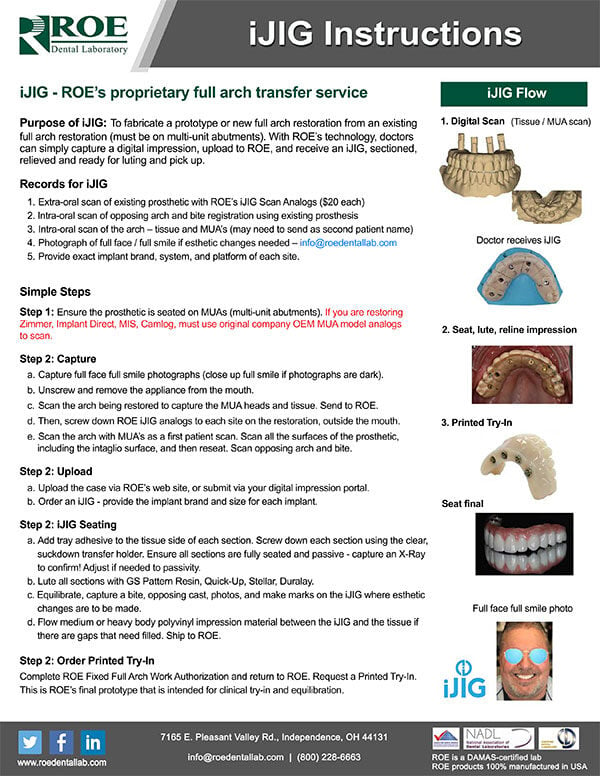
Instructions

Step 1: Seat the prosthetic

Ensure the prosthetic is seated on MUAs (multi‐unit abutments). Not compatible with Zimmer, Implant Direct, MIS, Camlog, Conelog implants. Must use these company’s OEM MUA model analogs to scan!

Step 2: Screw in analogs and scan

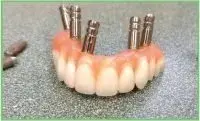
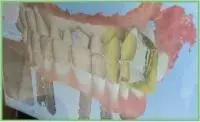
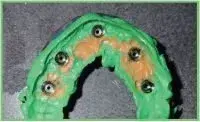
Unseat the appliance, screw down a ROE iJIG analog to each site on the restoration to be restored. Scan the arch with MUA’s as a first patient scan. Then, scan all the surfaces of the prosthetic with a digital impression scanner (All surfaces), and then reseat. Scan opposing arch and bite, and capture full face full smile photographs (close up full smile if photographs are dark).

Required records include:

  1. Extra‐oral scan of existing prosthetic with ROE’s iJIG Scan Analogs ($20 each)
  2. Intra‐oral scan of opposing arch and bite registration against existing prosthetic
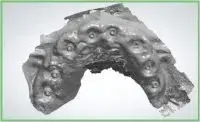
  3. Intra‐oral scan of the arch – tissue and MJA’s (may need to send as second patient name)
  4. Photograph of full face / full smile if esthetic changes needed
  5. Provide exact implant brand, system, and platform of each site!

Step 3: Upload the case to ROE

Upload the case via ROE’s web site, or submit via your digital impression portal. Order an iJIG and must provide the implant brand and size.

Step 4: Receive the iJIG

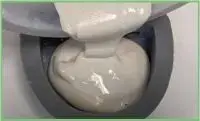
Add tray adhesive to the tissue side of each section. Screw down each section using the clear transfer holder. Ensure all sections are fully seated and passive ‐ capture an X‐Ray to confirm! Adjust if needed to full passivity. Lute all sections with GS Pattern Resin, VOCO Quick‐Up, acrylic, or Duralay. Flow medium or heavy body polyvinyl impression material between the iJIG and the tissue (reline impression). Equilibrate, capture a bite, opposing, photos if needed, and make marks on the iJIG where esthetic changes are to be made.

Step 5: Complete the paperwork

Complete the ROE Fixed Full Arch Work Authorization and return to ROE. Must indicate how you would like interaction of the final with the ridge: Hygienic design with ridge contact / high water design / other please explain. Order a Printed‐Try prototype. If the iJIG is nearly perfect, you may order the final restoration.

Step 6:  Changes / Adjustments

If esthetic or other changes are needed, ROE will create a resin Printed Try-In for final approval. This is a monochromatic chairside try-in verification for final. If there are more changes to be made, return with instructions, again using this Rx.

Step 7: Seat the final restoration

Seat final restoration (Zirconia, NanoTi, NanoTrinia, New Crystal Ultra)

Temporary Prostehtic ADA Codes

  • D5820 – Interim partial denture (temporary bridge)
  • D5810 – Complete denture, mandibular
  • D5840 – Removable unilateral partial denture (one piece)
  • D5860 – Removable unilateral partial denture (two pieces)
  • D5940 – Removable prosthodontic retainer
  • D5931 – Recement fixed partial denture

Frequently Asked Questions

What are the purposes of it?

  • Bone reduction verification
  • MUA angle guide
  • Delivery of the Provisional Prosthetic and RAPID Appliance
  • Spacer for reflected soft tissue
  • Verification that the driver is going in the right direction on angled implants (note the black square on angled sites)
  • Tissue reflection

Click here to learn more


What if the implants are not protruding directly under/through the sites?

This could mean any number of things went awry:

  • Pin Guide was not seated correctly
  • Implants are too deep or too shallow, changing the connection position
  • Implant was placed by hand or not inserted properly

Decide if they are placed in an area that is not acceptable. Take an x-ray to verify that they are in an acceptable position and make a judgment to remove or leave in place.

The plan called for the implants to emerge in a specific position, and the fix is to modify the Carrier Guide and the prosthetic for pick-up. Be sure the Temp Cylinders do NOT contact the Carrier Guide or the prosthetic during the pick-up.


What if the implants, MUA’s and temp cylinders are not aligning through the holes?

Verify that the implants are in the correct position. This can be observed visually through the Carrier Guide. If looks good, then the angled implants may be inserted in the wrong rotation. If it is, then the implant must be rotated, as little as just a few degrees. This should ‘right’ the MUA and Temp Cylinder.

Also, verify that the abutment screw is in line with the black square on the Carrier Guide. This square is where the driver passes through to deliver the abutment screw, in the same trajectory as the implants.

If the implant has been placed with the correct indexing to the hex on the Osteotomy Guide, then the MUA may need to be removed and placed in one rotation clockwise or counterclockwise. The best course of action is to follow the implant guided kit to deliver the implant exactly as the Hex indicates.


Do you have to use the gaskets?

YES. You must block out the pick-up material so as not to lock in the prosthetic. Can use light body, gloves for rubber damn, wax, other similar easily removed material.


What if Carrier Guide is not seating? Do you force it?

NO, do not force or bend. It will break and be detrimental to success.

Three main reasons it will not seat:

  1. Something is in the CHROME Loc box. Carefully inspect and clean.
  2. Bone was not reduced sufficiently and is ‘holding it up.’
  3. Soft tissue is in the way. Make a stitch, or reflect more if needed.

What do you look for that might be holding it up?

  • Something is in the CHROME Loc box. Carefully inspect and clean
  • Bone was not reduced sufficiently and is ‘holding it up’
  • Soft tissue is in the way. Make a stitch, or reflect more if needed.

Can the prosthetic or RAPID be used early on to check occlusion?

Yes, checking occlusion early is a good trick to know if there will be adjustment and to judge how the surgery is going so far, to see that everything is stacking correctly.


What if Carrier Guide breaks?

If the CHROME Loc insert breaks there should be two remaining that work. That is sufficient. If more break, then hold down the Carrier Guide through the remaining procedures. If the guide broke in half, reinforce with acrylic on the INTAGLIO side, not the occlusal side. Do not want it raising the prosthetic. There is a gap under between it and the bone. This part can be reinforced.


What if there is not enough torque on the implants?

This is very critical. The prosthetic must not be loaded if the torque does not meet the minimum number. We recommend using and ISQ device to check NCm’s.

If you do not plan to load, at least pick up 3 of the Temp Cylinders on the MUA’s for tripoding. This is a good index for the delivery of the prosthetic in two to three months. The remaining implants can be picked up later. There is NO WAY to do this once CHROME removed. Anything in the future is floating and cannot be picked-up. Pick up the RAPID Appliance at this point as well if possible.

What is the purpose of the Fixation Base?

  • Bone reduction. The occlusal edge of the Fixation Base is designed to indicate the level to which the bone needs to be reduced. The passive placement of the Carrier Guide onto the Fixation Base indicates sufficient bone reduction.
  • The Fixation Base is the foundation for all subsequent components in the CHROME GuidedSMILE surgery.

Does the CHROME loc’s engage? What if the plunger does not plunge?

  • CHROME Loc’s are carefully checked. Guides may be going in crooked. Inspect the CHROME Loc Box for material. Might be clear, broken Pin Guide plastic that is hard to see. Perhaps the case was heat cleaned and warped. Carefully adjust the hold on the insertion part that is going in the box, until the plunger plunges.
  • Taper the end of the plunger tip, round off the edge.
  • Rongeurs twist and pull. Be delicate, full removal is not terrible, just inconvenient because it will not work as designed for the rest of the surgery.
  • NO Autoclave, only 20 minutes cold sterilization

What if the plunger pulls out?

The pin can be re-seated. It will not function as the others. It will pull out every time, so please use care when pulling so as not to drop in the mouth. The plunger will still work. Clinical chairside support may have extra plastic sleeves to replace the damaged one.


What if the Fixation Base contacts bone in the posterior? What could that mean?

  • Exostosis that we missed. Lab may have trimmed the model and missed it. Inspect, a flap and adjust bone, or adjust metal with a disc, if possible – do not cut off a CHROME Loc or pin site.
  • Pin Guide may have seated crooked. This is BAD. If the teeth are still in, remove the Fixation Base and re-insert with the Pin Guide FULLY seated.
  • Mobile teeth may exist and the Pin Guide moved the teeth. If the Pin Guide has an integrated bite, re-start the case using the bite for seating the Pin Guide. Next time, inform the CHROME team of mobile teeth, especially of most or all are mobile. We will design a Pin Guide that seats against the opposing teeth.

What if the Fixation Base contacts labial bone?

Pin Guide is not seated correctly. Perhaps the bone is very soft and the malleting pushed the fixation base and oblonged the holes. This is bad. Suggest pulling the Fixation Base back out to mimic the GSI report images, pack gauze plugs between the Fixation Base and the bone and be gentle during the surgery. Or, just use the Fixation Base for bone reduction and then freehand the implants using the Carrier Guide as just a guide for close implant location. These are just suggestions for a case that is not aligned correctly. This is not a surgical recommendation! These suggestions can lead to very unpredictable surgery and results.


What if the Fixation Base wobbles?

Do not drill to depth. Drill ½ into the bone and use a surgical mallet to force the pins in. If it is too late and all the pins are in, this is bad. Suggest pulling the Fixation Base back out to mimic the GSI report images, pack gauze plugs between the Fixation Base and the bone and be gentle during the surgery.


What if the fixation drill breaks?

If you cannot back it out or easily remove, and you have an extra 2mm, leave it in place and use the other drill. Length can be measured by setting it next to a pin and using a sharpie. If this is the only drill, it must be removed. Remove the Pin Guide and the other pins and remove the drill. This is a last resort, as the removed pins will not fit the same as the initially did, and can be detrimental to the stability of the Fixation Base.


Do I have to buy two Fixation Kit for a double edentulous arches surgery?

Now the only time that you would need more pins is if you were going to do a double edentulous arch. In this situation, we often ask the doctor to do both Fixation Bases at the same time because the Pin Guides are duplicates of the denture, but are not the same teeth as the long term temps. In other words, the Pin Guides put the fixation base in the exact position using the teeth of BOTH dentures. You’ll need ALL the pins on these cases.

Further, the Pin Guide is a duplicate of the patient’s denture. So if there are dual pin guides, we want both of those in the mouth at the same time and at the right occlusion, everything fits perfectly, just like their old denture did, then you drill everything.

If you just do the maxillary, for example, and you go through the whole procedure and three hours later the patient’s wearing their future maxillary teeth, it doesn’t match up with the old denture lower Pin Guide. In this situation, we would have to make a pin guide that’s designed for the lower for the second surgery of the day. We would have to design it so that it meets the patient’s new prosthetic.

So instead of this, we encourage you to put both pin guides in, drill all the facial sites, put the pins in, load both metals, and you could take the lower metal out and put it back in in a few hours. It doesn’t have to be in there for three hours, but at least the sites are drilled in the right position.

What is the difference between CHROME and the many plastic guides I’ve seen?

There are significant differences between CHROME and every other guide. Unlike other surgical guides, which are made of plastic, CHROME guides are made of an extremely durable Cobalt CHROME alloy. This material is over 20 times stronger than surgical plastic and will not flex or break during surgery.

Because of their low strength and high flexibility, plastic guides must rest directly on the bone for stability. This means a doctor must create a large lingual flap to expose the bone, and then adjust the bone for the guide to seat. The teeth usually have to be removed, leaving very few good references for the guide. The guide must now fit the sockets of extracted sites, which is not very accurate.

Unlike plastic guides, metal CHROME guides float over the bone. This floating guide technology means zero bone contact and minimal lingual flapping, improving accuracy, patient comfort and healing times.

If you’d like to learn in depth about the benefits and functionality of a metal surgical guide system, download our free CHROME ebook.


What is the difference between CHROME and nSequence?

  • CHROME is much less invasive- no lingual bow, much smaller lingual flap
  • Full visualization during drilling and placing implants
  • Includes 5 parts rather than many, many parts that require training and extended manual
  • Tooth-supported, not bone-supported
  • No metal substructure to restrict implant position changes in surgery
  • Compatible with all implant systems with guided kits and MUA’s
  • Much simpler prosthetic conversion with the Carrier Guide, rather than the gasket floating system

Who works on CHROME cases?

Team of 26+, including 4 dentists, several CDT’s and many people with years of dental, surgical, CAD technology. The team is very impressive.


How long does a CHROME case take to make?

The CHROME timeline starts after you have collected all of the patient records and submitted your CHROME Patient Rx. We don’t start these cases until we have ALL of the CORRECT records – that is when the timeline begins.

ROE CHROME Days in Lab Circle Infographic

This complete process can be completed in a min. of 20 business days. This is unachievable if the patient records are incomplete or of poor quality – this is the reason we place so much importance on accurate, complete patient records.

Do not schedule your patient’s surgery until AFTER the online planning meeting. If changes are needed in the plan then this will delay manufacturing.


How much should I expect to spend on my first case?

Very good question. There a few things to consider, the Full Package, The Fixation Kit, Prosthetic Conversion Kit, spare denture(s), JC Try-In (optional), Chairside support and any work-up items. Email ROE your particular patient scenario and we can do the math together.


What if I want to split the fees with my surgeon (or referral)?

  • This is very important because you hate to have to figure out who owes what later. And quite often with these, the surgeon bears very limited lab costs.
  • It is best to agree on who pays for what upfront. ROE can provide a spreadsheet that breaks down our suggestion for surgical and restorative fees. We can email you this upon request.

What is the most challenging part of getting a case in my hands?

Generally, it’s the records that’s usually hold a case. CHROME GuidedSMILE records are simple but specific.
This section is designed to help you in all aspects of record capture.

Avoid surgical delays by going through our patient record checklists, watching our patient record videos, and educating your team on what is needed. We even help with the exporting of IOS files from your IOS, or DICOM files from your CBCT.


What diagnostic steps are not included in CHROME?

  • If we need to open the bite with our JC Try-In, or other lab fabricated methods.
  • If we need to duplicate or create a new denture, create a scan appliance, perform wax-ups… these items are outside the cost of CHROME.

What is included in a CHROME Complete Package?

  • The package includes almost everything to complete a CHROME case, from the PreVu smile simulation through day-of-surgery guides and long term temp, the final restoration, and the miniComfort guard.
  • The package includes one iJIG, one Printed Try-In, and one final restoration. It includes planning, live online meeting, digital set-ups, and much more. Cases do require our Fixation Kit, which has the pins and drill(s) needed to support the guide.
  • We offer a Prosthetic Conversion Kit for blocking out and luting during the conversion.
  • The package does not include implants, abutments, temp cylinders or other implant components, chairside support.

The complete CHROME package includes everything for the day of surgery?

The full package includes:


What is a miniComfort guard?

  • The miniComfort is a patented guard that covers the lower teeth only, except for the molars
  • It has two ‘elements’ that rest under the maxillary canines to keep the teeth separated
  • The idea is that the patient’s biting force is limited due to limited occlusal contact
  • It is a very popular guard for all patients

Click here to learn more about the miniComfort.


What is the Bite Proof product?

  • It is a long-term temporary.
  • If you really need to verify more than just our chairside JC Try-In, the bite-proof is more like an overlay temporary, more like a snap-on smile.
  • You’d actually bond it in place and send a patient home and have them back and equilibrate, workout the bite, workout the occlusion, et cetera. It might even be a week or two or more. And then once satisfied, they are the patient’s new teeth essentially.
  • That’s what the Pin Guide will fit when we move forward.
  • You would treat those like the patient’s new teeth. We don’t use it very often, but if you have a patient who you’re really concerned about producing a good bite, as they’ve had issues, then this is a possible solution.

How much can you open the bite in the lab?

We limit the bite to opening 3mm’s, sometimes 4 if the original bite is very accurate.


What is the cost of iJIG and Printed Try-In outside of the CHROME package?

Price may vary due to parts. Part prices will vary greatly depending on the implant system. Call ROE to get an accurate price.


What articulators does the lab use?

Our standard is a Stratos. We’re all calibrated. A lot of our doctors bought them from us so that they’re all calibrated. So if I wanted to buy a Stratus from you that’s calibrated what would the fee for that be? About a thousand dollars. We order it. We would buy it with the magnetic mounts and we would calibrate it for you and ship it to you.


What if a patient is edentulous and has not denture?

Well that patient walks in and they’ve got an awful denture, doesn’t fit, teeth are in the wrong place, etc, or they don’t have a denture. Let’s make them a new economy denture to be used as a back-up and a scan appliance. This is a cost outside the full CHROME package.


Do you make back-up dentures for the day of surgery?

  • Most doctors order a backup spare denture.
  • If this is a single arch case then you would order our 3D printed economy denture.
  • If it is a double arch case, then we like to mill both arches from the same PMMA material that is used in the long term temp so that the materials match if one arch does not get completed. The cost of this is double.
  • Rationale – you have a double arch surgery with beautiful nano-ceramic temporaries that are going to be loaded. But let’s say the maxilla doesn’t go and you have to load it with a denture. Well, the 3D printed economy denture does not have the same aesthetics as that nano-ceramic. So we can mill those backup dentures so that they are the same material as that nano product.

Does ROE have Ivoclar universal mounting jigs so that if I take a face bow with a Denar, Whip Mix or Hanau facebows?

Yes, we can mount your facebow with our universal Facebow Mount


What is iJIG?

  • The iJIG is a fit verification jig with teeth.
  • It is a scanned version of the provisional prosthetic, with our special iJIG scan analogs. It is the simplest method of transitioning from an existing full-arch prosthetic to a new final.
  • In CHROME, the RAPID appliance is an even simpler method.

What final restorations are available with CHROME?

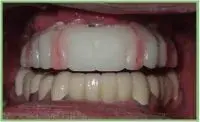
CHROME GuidedSMILE is compatible with FP1 to FP3 prosthetic options and is available in a range of restorative materials.
Click here for a detailed comparison of all prosthetic options.

Choose from material options including, but not limited to:

TLZ-IB zirconia is layered with cutting-edge translucent liquid ceramics to capture natural gingival esthetics, and is polished smooth for ease of cleaning.

All options include a functional prototype, which is tried-in and worn to verify function and esthetics prior to fabricating the final restoration. This facilitates a predictable final appointment and provides the patient with an excellent spare, “just in case”, appliance.


What is Ultra-Nano?

  • One solid block of composite is milled for the teeth and is bonded to either an opaqued titanium bar or on a Trilor bar.
  • Trilor is a metal-free material, kind of like Kevlar composite.
  • They are used by most of our clients, especially in double arch when clanking is a concern between zirconia arches.

Click here to learn more about Ultra-Nano ceramics.


What is a JC Try-In?

  • The JC Try-In is an appliance that we fabricate when a bite needs to be verified. We also use it when we open a bite on the articulator more than 3mm’s.
  • It is a printed flipper essentially, that the patient does not usually wear home. It is made for clinical equilibration.
  • If the patient is to wear it home, we need to know, because we will design it a little bulkier.
  • It should be returned equilibrated with a new bite registration, and always analog, never digitally. Capture photographs if the bite is changing much with the JC seated.

What are the normal steps to a final after CHROME surgery?

RAPID appliance or iJIG appointment and then a Printed Try-In and then a final.


Are we allowed to give out a list of doctors who do CHROME with our lab to patients?

ROE Dental Laboratory works only with doctors, dental practices and other dental laboratories. We cannot do any dental work for patients. We do not want to leave you needing help with no recourse though.

The CHROME GuidedSMILE patient booklet is to aid CHROME doctors in persuading patients to accept the proposed treatment plan. This booklet goes all aspects of the patient decision-making journey. Click here to download a sample file, or click here to purchase on our online store.

What if I need implant parts, can I order them directly through you?

We are happy to order implant parts for you, but please anticipate additional time for receiving the parts as well as additional costs. ROE does offer third-party parts that are stocked and carry the same warranty as OEM parts.


What implant systems do you regularly use?

ROE works with all implant systems.


What is the purpose of the Provisional Prosthetic?

The Provisional Prosthetic is a strong and esthetic prototype for the final restoration. It is designed for immediate load and extended use. The Provisional is delivered the day of surgery and remains in use until the final prosthetic delivery.


Is the Provisional Prosthetic milled or printed?

It is milled. We may have a printed option later, but for best esthetics and tooth strength, we mill from a solid puck.


Is the long term temp reinforced with metal?

We’ve made thousands of these cases and have had very little breakage. We offer metal for a nominal additional cost, in case you forsee a problem with a particular patient, or if the prosthetic is less than 12mm thick. The metal can cause issues during surgery if an implant needs to be moved.

Instead, we recommend an alternative modalities for improved strength in provisional prosthetics: C2F

  • C2F provisionals have small 2.5mm holes, similar to final restorations, and are compatible with all implant systems

What to do if the temp cylinders are touching the sides of the holes?

First, check implant rotation on angled implants – the best course of action is to rotate the implant until the Temp Cylinder is straight and parallel with the others. This means remove the MUA and use a hand driver to slightly adjust. The implant must be indexed precisely according to the Hex on the Osteotomy Guide for straight temp cylinders. The goal with CHROME is to deliver all parallel Temp Cylinders. This creates simple pick-up at the surgery and ideal screw access in the final. If the Temp Cylinders are going to be picked up in the current tipped position, then adjust the prosthetic slightly to remove the contact. Sometimes the Temp Cylinders can be seated from the top down. In other words, seat the prosthetic on the remaining cylinders and deliver the crooked cylinder from the occlusal hole. If not, again, adjust the shaft of the prosthetic to accommodate. DO not over adjust, need 3mm from shaft to outside of prosthetic.

For a small-hole, or no-hole protocol, ROE is proud to offer an alternative modalities: C2F. This system does NOT require the large occlusal holes in the provisional and the adjustments that come with such.


What if the doctor wanted ports and we did not include them?

Use #4 round bur and drill a hole through to the cylinder.


The prosthetic is seated but hitting the posterior or anterior first? Steps to correct? Or adjust the teeth?

Verify that the Carrier Guide is fully seated. If so, can shim a few millimeters and backfill. This will open the bite a little. If very high in the posterior, trim ½ of the pegs to remove resistance and shim halfway to occlusion then adjust the occlusion.


Prosthetic is already thin, and now there has to be a lot of adjustment?

Float the anterior and backfill. If double arch then trim the thicker of the two. Do not reduce to less than 8mm’s of vertical prosthetic material remaining. This very thin! MUST make an analog model with a flask as a back-up. MUST complete the RAPID pick-up to have a means of ordering another prosthetic during the healing time. This could have been observed at the bone reduction time with the Carrier Guide and RAPID Appliance or Prosthetic seated for testing. This means it should not be a surprise.

For a small-hole, or no-hole protocol, ROE is proud to offer an alternative modalities: C2F. This systems does NOT require the large occlusal holes in the provisional and the adjustments that come with such.


How do you check occlusion if the Temp Cylinders are too high?

Cut down the cylinders to be flush with the prosthetic.


What is the best tool for adjusting the cylinders?

Bite should have been verified at the RAPID Appliance and cylinders can be trimmed after the pick-up is completed. If the doctor wants to test the bite on the conversion prosthetic, then trim the cylinders in the mouth, or remove and trim. Mark with sharpie first. Trim with a 557 Carbide.


How do you modify or add-to your Provisional Prosthetic?

You can use powder and liquid monomer materials, other resins, composites.

What is the purpose of the Osteotomy Guide?

The Osteotomy Guide is an anchored drilling guide that:
  • Controls the implant depth, trajectory, and indexing (rotation)
  • Controls and stabilizes the kit’s spoons or drills


How should the Osteotomy Guide seat?

  • The Osteotomy Guide should fit passively with the Fixation Base, and is fixed using the CHROME Locs.
  • If applicable, the spoons in your guided kit of choice should fit with little to no resistance.
  • If the spoons are a little lose, ensure the top of the Osteotomy Guide sleeves and the spoon are flush seated when drilling all sites.
  • Be sure if there are divergent, very close implants, that the spoons will seat fully without touching one of the other sites. This would have been checked in the lab, but a verification is still suggested.

Spoons from the guided kit are tight. How can I adjust them?

Adjust as minimally as possible. Use a metal-cutting bur and indicator in the guide tube to identify exactly where the contact it. Turn the Guide upside down and look up into the tube and visualization of the hang-up area should be evident. If the spoons are so loose that it appears the wrong design was made, a clinical decision to move forward must be made. If the bone is very wide, proceeding may be ok.


Spoons from the guided kit are loose. How can I adjust them?

With the top of the spoon, make sure it is flat on the Osteotomy Guide and drill. If the ridge is very narrow use much more caution. Wrapping the spoon with Teflon tape is an option.


Trajectory of the site looks off. How do you test to ensure it is correct?

  • Assemble the spoon and drill and show the trajectory all the way to the bone. Often the sleeves seem lingual, but the sleeve is just the trajectory not the stopping point of the implants. In other words, the guide may look lingual, but it is in the position as designed.
  • Clinical judgment must be made if the guide clearly shows a wrong trajectory. Free-hand may be needed.


At what point do you bail and freehand?

Clinical solution: see the drill touching the bone first.


Implants have threads exposed, but the spoon is buried in the guide, what to do?

Perhaps the bone was reduced too much. Bone level must be an extension of the Fixation Base and not angle up or down from that plane. If this is the case, use training on treating exposed threads. If anatomically and prosthetically allowable, place the implant deeper using a hand driver.


Wrong implant sizes and parts are ordered? Can this be overcome?

Call the rep. Call the company to find the rep. Call doctors in the area with inventory! Find a compatible implant system and contact their rep. 

How does one start a CHROME case?

First, click the orange Submit CHROME Case button on any CHROME page. Fill out the digital Rx and click “Submit Rx and Go to Records Upload” button.

You will be prompted to upload patient records. CHROME records are simple, but specific.
For more information on records, we highly recommend visiting our easy-to-follow checklists & patient records page.

Summary:

1.  Patient Photographs:

  1. Full face full smile
  2. Full face exaggerated smile
  3. Full face profile
  4. Center retracted in occlusion
  5. Left retracted in occlusion
  6. Right retracted in occlusion

2. Master Casts / Impressions

  • Capture full palate
  • Capture most/all of the surrounding labial & lingual tissues, the vibrating line, and the full roll
  • If digital, export impression from intraoral scanner
  • Models are free of noticeable holes, skips, voids, or bubbles

3. Bite Registration

  • Capture full occlusion or CR bite
  • Taken with the patient in a closed bite, in natural occlusion
  • Taken with the patient’s prosthesis in mouth, if applicable

4. CBCT Scans – Protocol is specific to dentate vs. edentulous patients

Dentate:

  • Capture both arches
  • Taken with the patient in the open position
  • Taken with the patient’s denture(s) out of the mouth, if applicable
  • Export DICOM files from your CBCT scanner

Edentulous:


What if I am not digital? I don’t have digital impressions

  • Send your PVS impressions or models with a bite. Feel free to mount your case on a semi-adjustable articulator and we’ll scan the models and begin working on the case.
  • Whether digital or not, every case gets articulated on semi adjustable articulator. Every case goes through a multiple step evaluation. Actually we have dentists here who analyze the cases, make measurements of space, measurements of gingival zeniths for standard openings; we do all kinds of things to make sure that we’re ready to move forward, and that that’s a two or three day process.

How do I know what records to send for each type of case?

Click here for our easy-to-follow checklists


What CBCT cone beam scanners do you work with?

  • We work with all cone beam scanners.
  • We just need the ‘raw DICOM’ from the scanner. We need multi-file DICOM, which should be a set of files that end in .dcm.
  • Simply export them into a folder, and then zip the folder.
  • Submit CHROME Case and upload this zipped folder along with the rest of your records.
  • If you are having trouble, check out our page on how to export DICOM files.

Walk through beginning a CHROME case

  • Optional: Before taking the patient records, you may wish to submit a full face, smiling photo of your patient for a Smile Simulation to photos@roedentallab.com. Smile Simulations use advanced software to give a preview of a final smile and are a great case-acceptance tool.
  • Click the orange Submit CHROME Case button on any CHROME page. Fill out the digital Rx and click “Submit Rx and Go to Records Upload” button.
  • Upload your records as listed in our easy-to-follow checklists or patient records page
  • ROE will perform a set-up that you can see if requested.
  • Within 3 days of receiving the records, we will contact you for additional records, or send an email asking for the online meeting schedule.
  • We host a live online meeting where a pre-planned case is ready for your review.
  • After the online meeting, schedule surgery.
  • We fabricate the case and ship to you after 10 lab days of production.
  • Optional: You may request a chairside technician to be present on day-of-surgery. We recommend this option especially for your first CHROME GuidedSMILE case.

What if the patient is wearing a temporary prosthesis?

  • Ensure the patient is wearing any existing prostheses in the patient photographs.
  • If the patient has a temporary on the surgical arch, capture impressions with and without the temporary seated.
  • When taking the bite registration, if the patient has an opposing prosthesis, the patient should wear it to stabilize the bite.
  • If the patient is dentate, take the CBCT scan in an open position with the prosthesis OUT of the mouth.
  • If the patient is edentulous, take the CBCT scan in a closed position with the prosthesis IN the mouth. Follow a dual scan protocol

What photographs do you want for CHROME?

We require six patient photographs to start a case:

    1. Full face full smile
    2. Full face exaggerated smile
    3. Full face profile
    4. Center retracted in occlusion
    5. Left retracted in occlusion
    6. Right retracted in occlusion

For examples and helpful tips, check out our easy-to-follow checklists & patient records page.

Optional: Before taking the patient records, you may wish to submit a full face, smiling photo of your patient for a Smile Simulation to photos@roedentallab.com. Smile Simulations use advanced software to give a preview of a final smile and are a great case-acceptance tool.

Pins are all short but the plan says long?

This is ok. Use the short pins and do not drill to full depth. Use a surgical mallet and tap the remaining 3-4 mm’s. If the plan calls for short pins and you only have long, a judgement call must be made. It may be okay to tap through the lingual cortical plate. This solution changes doctor by doctor and where the exit point is, mandibular or maxilla. Long Drills are 25mm and Short Drills are 21mm. Can leave the long drills protruding from the Fixation Base. This is the best option, as the trajectories of the pins should hold the base in place.


Drill breaks in the Fixation Base – how do you remove it?

First question, do you remove? If it is not protruding through the Fixation hole then may just leave, especially if there are 3 more. If removal is needed, remove the Pin Guide, remove other pins and then Fixation base, and remove with rongeurs. Now what? Your drill broke. The drill is a 2.0mm that coordinates with the pin length, but, you can simply get another drill from another kit and use a sharpie to measure the length compared to the pin, and drill. You can always under drill and mallet into place.


Drill all sites first? Or what is the procedure?

Drill one at a time, push in the pin and move to the next site. Best practice is switch from far right or left, over to far opposite site. It is very important to not move the Fixation Base with the pin, rather, stop the pin at the Fixation Base sleeve.


When to mallet the pins?

‘Always mallet’ is a good protocol, even if it is just the last few millimeters. The pins should have resistance so that they do not come lose during the procedure. If the pin(s) is pushed to full depth easily, do not drill the next site to depth. Leave the drill a few mm’s short and mallet the pin until flush with the fixation base sleeve.


Pin Breaks, what is a substitute?

  • Very rare, but can use a drill or bur shank to hold the base in place.
  • Recommend back-up drills and pins kits

Pin is loose

Don’t drill to depth. Stop 3-4mm or more short of the drill stop and mallet the pins in. If the Fixation base is lose after all the pins are seated then the bone is probably of very low density. There is no good solution, but can us a cotton plug and wedge between the bone and the Fixation Base to force the metal out, away from the bone. Try to mimic the image on the GSI report. There are images of how the metal should relate to the alveolar bone. Be very careful with assembling and disassembling the guides.


How do I order Pins and Drills?

Question to Customer: Do you know if you need long or short, and how many? If the customer knows, then take the order and keep reading. If they do not know, then you can look in the M:/ drive at the GSI report for the specific patient and page two will tell you ‘Long or Short’.

ROE sells Pins and Drills for our surgical guides. CSR can take the order and write the case up and email Data Entry to add a Pan and give to Guided Surgery Department. Once established Pins and Drills are sold as ala cart items. They are called a “material”.

ROE Codes: Example Materials

CLFIX01 CHROME PIN – SHORT

CLFIX03 CHROME DRILL – SHORT


How much are guided surgery Pins and Drills?

Fixation Pins are $42 Each and a Drill is $99. We recommend purchasing a full kit with 4 long pins 4 short pins and 2 drills for $534.


What is the prosthetic conversion kit?

  • That is an al a carte item that most of our doctors buy.
  • It includes 1 tube of Stellar dual cure Pink and White tubes, special block-out gaskets and plugs.
  • It includes materials for the quick conversion.
  • We’ve tried many materials on the market and developed this kit to be the best.
  • ERA pickup does not seem to be strong enough, Duralay is not esthetic, and other materials have just not proven themselves.

How much does it cost?

2019/Q2 – $188


What is included?

Quick-Up, adhesive blockout gaskets, syringeable blockout, applicators


Do you have to use the adhesive?

YES – will not bond without the bonding agent


Is Voco light cure or self-cure… or dual-cure?

We only includes the SELF CURE ONLY Voco


Does the prosthetic have to be dry to use Voco and adhesive?

Must be completely dry, including clean of blood. Future debonding eminent if the surface of the prosthetic cylinders is dry or contaminated.


What alternatives are good when VOCO is gone or missing?

Duralay, acrylic, Holmes Quick Set, GC Pattern Resin, Stellar. If these materials are not available find a doctor in the area and ask. Do not use standard acrylics.


Should the inside of the cylinders be adjusted for mechanical retention?

Yes, very helpful, especially if not using VOCO or GC Pattern resin. If using acrylic or ERA pick-up (not advised materials), yes.


When to cut off posterior teeth?

5mm distal from the posterior hole. Optional to grind down the posterior tooth down so that there is a flange extending posteriorly for the iJIG to capture the ridge when going to final. This is nice for capturing the posterior ridge in the future. This is up to the doctor if to leave the distal flange. If the doctor is going to make an iJIG then recommended to leave the flange. If picking up the RAPID (advisable), the posterior teeth are not removed and the ridge can be captured under the molars later.


What is the minimal torque for immediate loading? Do you add the implant torques together?

Totally up to the doctor. But we’ve heard doctors add them for a total of 140 rule between all of them. We don’t recommend. Can add another implant in the area. Sleep implants and add to the RAPID, or iJIG later.


What if the hole is too deep for the doctor’s tools to tighten and loosen the temp cylinders?

Ask the implant rep for a longer driver. Our clinical techs bring long lab drivers to surgeries.


What if you have to choose a different site for an implant? How do you adjust the carrier guide and prosthetic?

Index the carrier where the hole is and adjust the prosthetic, making the hole smaller than the others so that not to jeopardize strength. Can also go back to the denture prosthetic and convert, All-on-4 style, as a last resort.


How many implants are too few to continue?

3, unless one is in the middle. Total clinician judgment call.


Can you load a spinner?

No

What is the purpose of the RAPID Appliance?

The RAPID Appliance (ROE Advanced Prosthetic Implant Device) is a duplicate of an existing prosthetic. It has two functions:

  1. Serves as the simplest method of transitioning to the final. Simply add tray adhesive to the intaglio, seat, capture a reline impression, equilibrate, and send to ROE with bite opposing and photographs.
  2. Serves as a back-up indexed prosthetic in case the surgical prosthetic fails. Simply seat the RAPID, equilibrate, capture a bite and opposing, and send to us for a new temporary or printed try-in. We can go to final, or return what we call the Printed Try-In, a screw-down final prototype for clinical verification.

How is a RAPID Appliance made?

There are a few ways to creating the RAPID prosthetic duplicate appliance. In surgery, CHROME allows the doctor to perform a simple prosthetic pick up, loaded on the Carrier Guide. The other method is a flasking technique where the doctor removes and existing appliance from the mouth and adds analogs to the copings and sets the copings in stone. Once set, putty is molded over the prosthetic, then removed once set and a negative has been captured of the prosthetic to send to the lab, with a bite, opposing, photos and clear instructions.


If I do the RAPID, do I have to do an iJIG?

No, the RAPID serves as a verification jig. This means we have a verified model, the teeth, the opposing and bite, and new tissue levels, everything we need to make a prototype.

What is the purpose of the Pin Guide?

The Pin Guide ensures that the surgery starts accurately. Its only purpose is to accurately deliver the Fixation Base.

Dentate Pin Guides seat securely on the teeth and are verified via occlusal windows. The Pin Guide is held down firmly to maintain its position while the fixation pins are set. Due to tooth undercut, not all the windows need to be seated, just the occlusal/incisal


What if the Pin Guide does not seat fully on the teeth?

Seat using indicator and adjust until all the windows on the Pin Guide are in contact with the teeth. Caution, due to tooth undercut, not all of the window needs to be seated, just the occlusal/incisal. View how the Pin Guide seats on the model. This should be repeated intraorally.

If the teeth are mobile, they may need to be manipulated into the Pin Guide similar to how they were impressed.


What if the patient had dental work since initial impressions?

Modify the Pin Guide or extract teeth that do not impact the seating of the Pin Guide.


Are there teeth to be removed?

Refer to the included implant report. We make notes on extractions. Remove the specific teeth noted on the GSI form, due to mal-occlusion or draw.


When is too much adjustment too much?

If aggressive adjusting clearly changes the fit and seating accuracy of the Pin Guide, this may be cause enough to stop the surgery and capture new records to start over.


What if the Pin Guide is contacting the vestibular tissue and will not seat?

Flap the tissue until the Pin Guide seats. In other words, flap earlier on this arch. This is due to the initial impression not capturing the full vestibule, or the bone reduction is beyond the vestibule. Once seated, inspect and adjust if needed.


CHROME Loc Loop is broken

Must use manual clamping (fingers) to hold the Pin Guide and Fixation Base together. Pin Guide and Fixation base insertion accuracy is vital to the success of the case. The surgery could also be put on hold for a new Pin Guide to be ordered. The case should be returned to us to ensure accurate assembly.


What to look for when inspecting?

Does it fit into the Fixation base passively? Do the CHROME Loc plungers easily and almost passively insert? If not, there could be material inside the CHROME Loc box preventing such. This could also mean that someone heat cleaned the guide. Use a narrow bur and open the hold on the Pin Guide CHROME Loc loop until the plunger seats.


What if it does not seat after an adjustment?

This probably means the model is not accurate, or perhaps the Pin Guide is fabricated with errors. The case must start with a fully seated Pin Guide. The case may have to be delayed. This is a clinical call based on how far off.


What if the CHROME Loc plunger pin pulled out?

The pin can be re-seated. It will not function as the others. It will pull out every time, so please use care when pulling so as not to drop in the mouth. The plunger will still work.


What if the Pin Guide loops are broken?

Must use manual clamping (fingers) to hold the Pin Guide and Fixation Base together. Pin Guide and Fixation base insertion accuracy is vital to the success of the case. The surgery could also be put on hold for a new Pin Guide to be ordered. The case should be returned for us to ensure accurate assembly.


Edentulous flap first? Seat drill and then Flap? What is our protocol?

The protocol is to not flap first. Seat the Pin Guide, drill all the sites, remove the Pin Guide, flap and re-seat and insert pins.

Alternatively, the flap can be made first. If so, carefully follow the instructions that are provided with each case. This is a ridge incision first, top of ridge flapped forward. Must use care with swelling from anesthesia. Must ensure the Pin Guide is very accurately seating even though there is no labial support.


Edentulous Pin Guide seating? How to adjust?

Just like a denture, using indicator and finding the perfect seat. Be sure to account for swelling from inflammation from the anesthesia. Hold FIRM using two people or more, solid, consistent pressure. Do not use a surgical mallet until all the pins have been pushed in as far as they will go with finger pressure. Using a surgical mallet too early can put uneven pressure on the assembly of Pin Guide and Fixation Base.


What if all or most of the teeth are mobile?

This is critical. If the Pin Guide moves the teeth, the implants will be in the wrong position. Let us know early in the planning. We will fabricate a Pin Guide with opposing bite integrated. The patient will be closed biting on the Pin Guide while the facial pins are being seated. If there is no bite designed in the Pin Guide, use the palate for stability, or on lowers try to use the tissue.


Edentulous Pin Guide used to verify vertical

If the Pin Guide is a replica of the denture, seat the Pin Guide and mark the nose and chin to verify final prosthetic accuracy. If this is a double arch, the Pin Guide will probably have a bite integrated, so the vertical is not centric and this technique cannot be used.


Double Edentulous protocol?

Options:

  1. Complete upper full surgery and prosthetic conversion and then lower arch. The mandibular Pin Guide has a bite that is designed for the maxillary temporary prosthetic. In other words, when the max is finished, use the max teeth to ensure proper seating of the mandibular Pin Guide.
  2. Seat both Pin Guides initially and drill all the maxillary and mandibular sites. Complete the maxillary first, then flap the mandibular and the holes are already there for the pins. Both methods are acceptable. Follow the instructions included with each case for the flapping technique.