
Overview
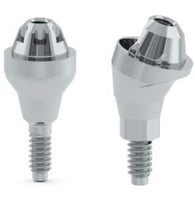
MUAs bring the platform of the implants to the tissue surface for prosthetic attachment. They also correct implant angles, allowing placement of up to 40° off-axis. Some companies offer MUAs with correction angles >45°, enabling restoration of severely angled fixtures. Custom MUAs are also available.
The goal of the Seat MUAs workflow is to seat MUAs at the ideal orientation, in order to get to the next stage of the restorative process.
Prerequisites
- Patient must have implants
Technology & Materials
If capturing analog records:
-
MUAs
- PVS impression material
- Optional: Dental stone
- Optional: Denture flask/cup
If capturing digital records:
- MUAs
- Intraoral scanner
- Implant-level scan bodies
Workflow Steps for Seating MUAs
| Step | Instructions | Image |
|
Important: If you would prefer to determine orientation for prosthetic screw access without ROE’s analysis, you may skip steps 1-3 and go directly to step 4. |
||
| 1. |
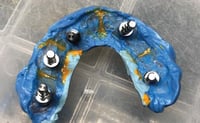
Follow the implant company’s implant-level impression protocol. Tip: In this workflow specifically, ROE recommends capturing PVS impressions instead of IOS scans to save considerable lab fees. |
 |
| 2. | Send a duplicate, flask, 360° scan, or the existing denture to ROE Dental Laboratory. Include the implant-level impression. | 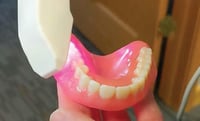 |
| 3. | ROE will analyze the case for tissue depth and angulation for adequate screw access, and contact the office with MUA recommendations. | 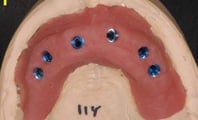 |
| 4. |
Order MUAs from your implant rep, or from ROE Dental Laboratory.
|
|
| 5. |
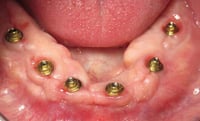
Seat MUAs. Choose a workflow from the Patient Scenario ‘Implants with MUAs’ (see page 13) to proceed. |
 |
Additional Resources
For more information concerning Restorative Protocol's:
- Full Arch Solutions Product Page
- Ultimate Restorative Protocol Guide - Your Guide to ROE's Restorative Protocol
- More Restorative Protocol Guide Workflow's
Contact Information
For help with Restorative Protocol's for your next case, contact ROE Dental Laboratory:
- Phone: (216) 663-2233
- Email: info@roedentallab.com