
Overview
Metal-free partial dentures are becoming increasingly popular due to their numerous advantages. These include enhanced biocompatibility compared to conventional acrylic resin partial dentures due to the absence of residual monomer, superior esthetics as their resin clasps are nearly invisible unlike traditional metal clasps, and improved patient comfort thanks to their thermoplastic resins which have a lower elastic modulus and may be modified chairside.
The doctor may modify the fit of these clasps chairside with the use of a heat gun or torch.
Technology & Materials
-
Optional: IOS scanner
-
Optional: PVS impression material
-
Pressure indicating paste
- Denture polishing and metal finishing tools
Workflow Steps for Partial without Metal Framework
| Step | Instructions | Image |
| 1. |
Take the following photos with the patient standing up:
|
 |
| 2. |
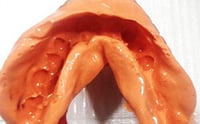
With no prosthesis in the mouth, capture records including:
|
 |
| 3. |
Optional: If the patient has an existing prosthesis, seat and capture records including:
|
|
| 4. |
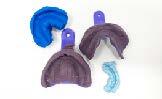
Send your records to ROE and complete the Rx via www.roedentallab.com/upload. If using an IOS, submit your scans via the IOS portal, OR export your .STLs and upload to the ROE portal. |
 |
| 5. |
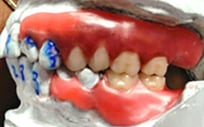
Optional: Order wax try-in(s) from ROE. Seat the wax try-in(s). Verify the esthetics, phonetics, VDO, and occlusion. Make adjustments as necessary. Return try-in to ROE.
|
 |
| 6. |
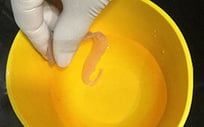
Seat the new partial denture. If a clasp fits too tightly in the patient’s mouth, use a heat gun or torch to warm up the plastic (212°F/100°C), then bend the clasp outwards and cool it in cold water. If a clasp is too loose, follow the same procedure except, bend the clasp inwards. |
 |
| 7. |
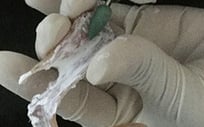
Use pressure indicating paste to determine pressure areas. Make adjustments as necessary, finish, and polish. |
 |
| 8. |
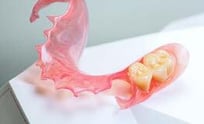
Seat the new denture. |
 |
Additional Resources
For more information concerning Removable Solutions:
- Removable Solutions Product Page
- Removable Solutions - Your Guide to ROE's Full & Partial Dentures
- More Removable Workflow's
Contact Information
For help with Removable Solution's for your next case, contact ROE Dental Laboratory:
- Phone: (216) 663-2233
- Email: info@roedentallab.com